Friday, March 27, 2015

A Dresser for the Kid

After our big online shopping spree, we had almost all the furniture we needed. The big thing that was missing was a dresser/changing table. We wanted a piece of real furniture that would stay with the kid well past the diaper days and on into teenagerhood. I am on a slow mission to replace all the chinsey, fiberboard and sawdust furniture that we both bought for our first apartments with real furniture made of real wood, and wanted something really solid for him.

Step 1. Find a Dresser
I looked at some of our favorite online shops for new furniture, and was blown away by the prices and low quality. I really refuse to pay hundreds of dollars for furniture made with fiberboard, no matter how nice it looks. So then we started looking at second-hand shops, which were still pricey and very hit-or-miss.

Then I finally turned to Craigslist. I searched every day, several times a day for almost two months. I found lots of really cheap crap that was just awful. I found a couple solid pieces that were nice, but needed a lot of work. I found a couple that were great, but by the time I expressed interest- they were already taken. Then I found the perfect one-  I contacted the seller immediately, offered to come get it immediately, and went to pick it up that night.

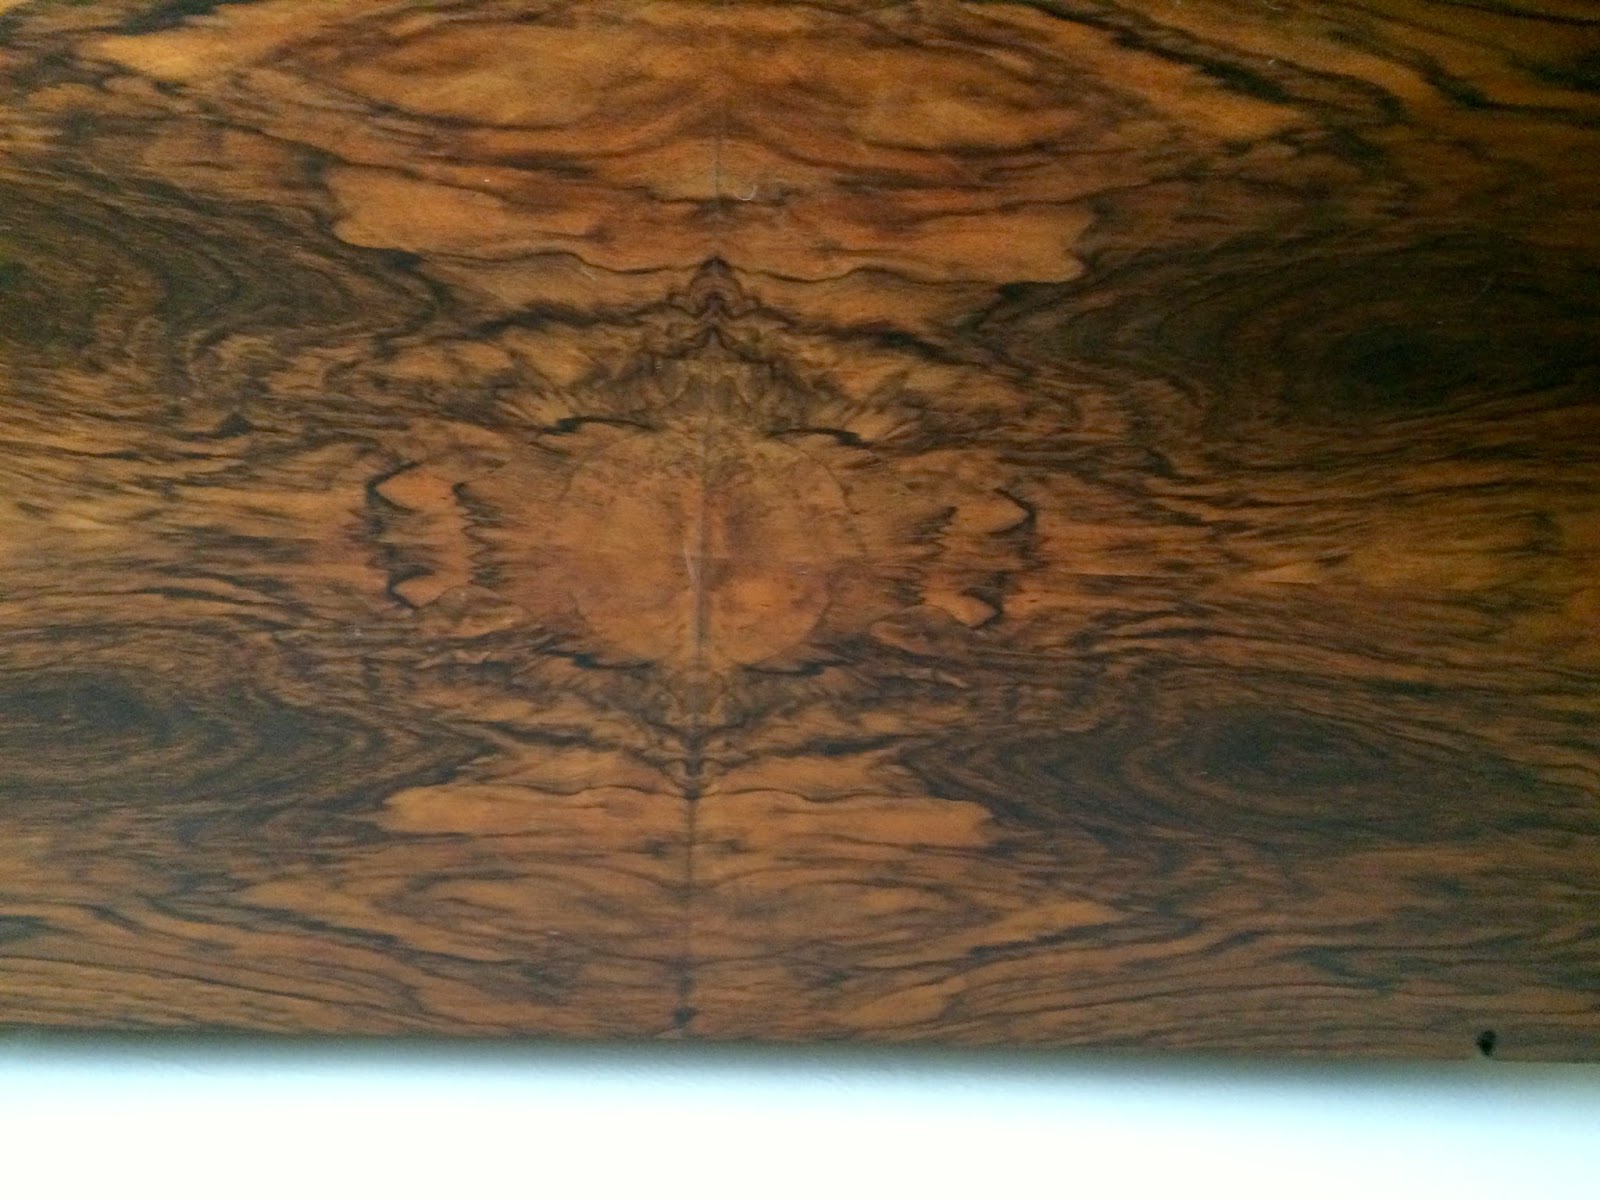
For only $100, we got this amazing dresser with a curvy front and claw feet. The frame of the dresser is solid wood, and the top, sides and front are covered with a wood veneer with a cool burl thing going on.
the new dresser arrives in the dining room

Step 2. Remove the Finish
Of course, it wasn't perfect - so as soon as I saw it, I knew I wanted to refinish it. There were a number of scratches on top, plus the color was a bit too orange for me. So, on a nice warm day, we moved it outside and got to work sanding it down. We opted to sand by hand to make sure we didn't accidentally gouge the veneer. We started with a coarse grit sanding block.

The frame of the dresser quickly sanded down to the bare wood, but the veneer parts wouldn't give it up.  So we broke out some stripper, and put a light coat on all the veneer pieces. We let it sit for a very small amount of time (like 10 minutes) to avoid it eating through the veneer, and then scraped it off. Then we went back and resanded those pieces again with a medium grit sanding block, just to make sure all of the finish was removed.

dresser covered with stripper

all stripped and sanded and ready for stain

Step 3. Prep & Stain
Once it was all sanded down, we moved it into the garage, and I cleaned it up and applied wood conditioner. Conditioner helps prep the wood so that the stain soaks in evenly. It's super easy to apply, so I just grabbed a foam brush and quickly added a coat. Then, I took another foam brush and our dark walnut stain, and carefully added a thin coat of stain to the whole thing, in the direction of the wood grain. I came back with a rag to wipe off the excess.

dresser getting stained in the garage

Step 4. Finish
I let it hang out overnight to dry, and then came back with a new foam brush and the polyurethane to finish. I added a thin coat in the direction of the grain, let it soak in and dry, and then added another. After 3 coats - I called it a day. This is oil-based poly, so it is stronger than water-based but has more fumes - so it was important to do this process outside in the garage. Then we moved it into the new kid's room.

Step 5. Accessorize
Once the wood was all finished, I attached some new knobs. We picked up these guys from Anthropologie, which has lots of fun hardware options. Lastly, we bought a changing pad and several covers to make this a functional changing table. We attached the changing pad to the dresser so it can't fall off with a screw in the back.

screwing down the safety strap

closeup of the knobs


claw feet with toe nails

a view of the top

all done and ready to change some diapers!

view down the hall - check out those lovely floors and lack of thresholds

view from the side

Now that we have a functional changing table and dresser for clothes and stuff, we officially have all of the furniture. The room is actually feeling a little cramped - hopefully we didn't overdo it! We just need the last finishing touches, and this room's all done. 

Wednesday, March 25, 2015

Refinishing the Floors

As soon as we first looked at this house, I knew I wanted to refinish the floors for a couple of reasons.
  1. The floors are currently not stained, which makes them very light and kind of yellow. I prefer a medium-tone, warmer brown color for floors.
  2. The floors used to be a very dark stain that was removed lazily, so you can see bits of the old color in corners, under radiators and in other various places.
  3. The finish has worn off in several places, making the wood really vulnerable to anything that gets spilled on it and an ugly grey color.
  4. There are gouges and scrapes in lots of places.
  5. There are a lot of paint drips (not from me) and other mysterious things stuck to the floors.
looking down at the spindles on the staircase- you can see the old dark stain that was never removed

some deep scratches in the bedroom

the floor looks grey where the finish has worn off
So, we knew we wanted to redo them, but never really made it a priority to get started. Since we're redoing the kid's room now, it seems like a good time to get in there, before a baby arrives. And as long as we're doing one room, we might as well do the whole floor. (Of course we would rather do the whole house, but we're going to cut this project in half both to reduce cost and chaos, and come back for the downstairs once the kitchen is ready. Our house has a fun feature of having pine upstairs and oak downstairs, which was common in the early 1900s, so it's not like the floors would match perfectly anyway.)

I would love to do this project myself. In fact, I have done this before, and it's not that big of a deal. But, my doctors wouldn't clear it, and Spouso didn't want to do it all by himself, so we opted to hire it out instead. (This is one project where you don't save that much by doing it yourself, so we didn't feel too bad contracting it out).

Step 1. Make Backup Plans
Once we got a few estimates, picked a flooring company and started talking through the logistics, we realized that we would be stuck downstairs for a couple days and nights. So we packed some clothes and moved the air mattress downstairs. We figured that we could shower at our neighborhood gym and brush our teeth in the kitchen sink, but had no good options for restrooms. So we installed a toilet in the future half bath. Probably most people don't need to start out their floor refinishing projects by adding toilets to their houses randomly, but this was sort of critical for us-- and it was going to get done eventually anyway.

halfbath is all finished! Let's call it "rustic-chic".

Step 2. Get Everything Out of the Way
We already worked on emptying out the new kid's room, but the rest of the upstairs still had lots of stuff in it. The night before they arrived, we quickly moved all the small stuff, drapes, wall art, and clothes out of the rooms. As much as possible got piled onto the sleeping porch, and the rest got dumped throughout the downstairs. When the floor guys arrived on the first day, they moved the heavy furniture out to the sleeping porch.

Step 3. Scrape and Sand
Then they started sanding down the floors to remove the dirt and grime, old finish, paint drips, scrapes, and whatnot. They hand-scraped the steps, getting at all the old dark stain that had been left behind. They used a big drum sander for the floors, and a smaller rotary sander to get closer to the walls. They hung some plastic sheets to cordon off the area to reduce dust, but it was still a pretty big mess. It was also ridiculously loud, so the cats were not happy.  This was a really long day, but they did a really good job. After they left, we were able to carefully walk on the freshly-sanded floors, but tried hard (but unsuccessfully) to keep the cats off.

stairs getting hand scraped

green room all sanded down

Step 4. Stain
Before they finished sanding on the first day, we tried out stain colors. We knew we wanted a medium, warmish tone, but weren't exactly sure which stain to pick. So we tried 3 samples of MinWax: Provincial, Early American, and Special Walnut. Once they were applied and somewhat dry, we quickly chose Special Walnut. I'm not particularly surprised, since this is just a lighter shade of the stain I usually use on furniture, but it was interesting how different they looked on the floor than in the pamphlet.

stain samples on the floor


stain colors on the website & pamphlet

The second day, after they finished a bit more sanding, they applied the stain. It went on pretty quickly and was immediately gorgeous. Then they left to let it dry overnight. There were slight fumes, but nothing serious, so we slept on the air mattress on the first floor again. Unlike the previous night, we really couldn't walk on the freshly-stained floors, so keeping both us and the cats out became the real trick of the evening. We had to build some serious box walls to keep them out. (Thankfully, we have no shortage of boxes right now).

green room with stain

cat box wall

Step 5. Install New Shoe Molding
Part of the project was to replace the shoe molding, which had to be removed for the sanding process. We wanted the new shoe molding to be painted, not stained, so we worked out a deal with the floor guys to drop off lots of shoe molding the first day. Then I painted it in the garage on the second day, where it hung out to dry. On the third day, they cut the painted shoe molding and installed it. This way, I didn't have to worry about trying to paint the shoe molding in place, where I would almost certainly end up painting the new floors, or having to use painter's tape which I'm not a big fan of anyway.
new shoe molding goes in, but there's a visible gap between it and the baseboards

Step 6. Finish
After they finished with the new shoe molding, they applied a sealant to the floor and then polyurethane. We opted for water-based poly instead of oil-based, because it has fewer fumes and dries faster. They put down 2 coats throughout the day, giving it a couple hours to soak in and dry between layers. Then they left to let it finish drying. The fumes were almost non-existent, but we needed to stay off the floors to let them dry and cure, so we stayed downstairs again and left the windows open upstairs.
green room with poly

piles of cats and all our stuff crammed in the dining room

Step 7. Caulk and Paint the Molding One Last Time
The next morning, I crawled out of the air mattress one last time to finish up the trim. They had already cut and installed the painted shoe molding, but there was a significant gap between the new shoe and the old baseboards. So I caulked the gap, let it dry, and then painted the caulk. Let me tell you how tired of molding I was at this point - now at least the third time I've had to scoot myself around the floor messing with the trim, which does look much better, but still looks lumpy and bumpy in lots of places.
the same corner I've been showing you- all done

Step 8. Move Back
The night of the fourth day, we carefully moved our bed back into our room. The next morning, the team showed up to quickly move the heavy furniture back into place. That night, we moved the last of the small things back where they belonged. In only five days, our house went from normal to disaster zone to better than normal. Now everything is finally back together and looking fantastic.

closeup of the floors - darker, shinier and without junk

The floors look great. I was worried when they initially put the stain down because it seemed a little too dark- but once the finish was dry and it had a nice sheen, I was totally convinced. Everything looks warm and classy. The floors are all uniform, without drips, scratches, bad spots or weirdness, and the trim really pops. We are very happy with all of the rooms, but most excited to finally get to put together the kid's room.

sneak peak of the kid's room- stuff starting to go in


Monday, March 23, 2015

Fun Stuff for the Kid's Room

So, things are happening way out of logical order for the kid's room - we bought a bunch of new furniture before the old stuff was even cleared out of the way. While we worked on prepping the walls and trim, we didn't want to stop shopping for other stuff, so we kept accumulating things for the room that couldn't actually go in the room until the floors were all done. Unlike the pure online shopping spree I last posted about, this time we're getting a little more creative and resourceful. Hopefully, this stuff is what will make the room unique and personal, and not just another cookie-cutter nursery.

1. Floor Pillows
We got two euro-sized pillows for our wedding, but never got the quilt and pillow covers for them, so the pillow inserts just sat around. I had a brilliant idea to make envelope pillow cases for them so that they could be floor pillows in the kid's room instead, recognizing that we're never going to buy the fancy quilt for ourselves that we originally planned on. So, following the same general envelope design that I described here, I made 2 big pillow cases using 2 different fabrics on each to contribute to the overall blue/grey color scheme we have going. Now, if you're at our house and want to play with the kid on the floor you've got a comfy place to sit! (you'll thank me later).

two new floor pillows

2. Hanging Thing
I wanted something to hang above the new glider chair to give the kid something to look at while eating, and provide a little light for bedtime stories. I originally pictured some sort of awesome hanging paper structure, possibly made of big poofy tissue-paper flowers - but spouso fell in love with this sailboat kite he saw on Houzz. Our compromise was to get the kite and let me cover it in fairy lights. It's all strung up now, and just waiting to get hung.

new hanging sailboat with lights

3. Wall Art
We definitely wanted to get some fun wall art for the room that would be kidish but not boring - so we turned to Etsy. We picked a bunch of smaller items that will be a grouping above the dresser, and then one big map to go above the crib. They all have sort of an animal/kidish theme, and are roughly blueish and greenish to coordinate, but they otherwise have a lot of variety, shouldn't look too matchy, and hopefully will keep the kid interested for years to come. Because they're all prints of original art, they are cheap and easily replaced if the kid grows out of them. I'm excited that they are all original art and coming from artists all over the world (Canada, US, England, France, Australia). We grabbed a couple cheap frames from Amazon, and poof! We have wall art. The etsy shops we picked are here: 1, 2, 3, 4, 5, 6, and 7, but there were a bunch more we liked. Etsy is amazing.

some of the new wall art

Cheapie tip - getting art professionally framed looks great, but is way out of our budget. Instead, we buy cheap, standard-size frames from places like Target and Amazon. Usually I just use the white mats that come with the frames, but to fancy things up a bit, we swung by a framing shop to get a colored  mat cut to fit the map print and frame. It's cheap and makes the art look so much more professional. We're sticking with the white mats for the grouping of smaller prints so they look a bit more cohesive.

4. Mobile
Next, we needed an interesting mobile for over the crib. We wanted to get something that would move around and interest a baby, and be cool enough to interest an older kid (ie, no fluffy bunnies). Again, we turned to Etsy and found lots of really cool options. We ended up with one from this shop, which was made just for us, and is currently on its way from Croatia.

new mobile 

5. Side Table
Once we had a comfy chair and the footrest/pouf, I realized that if we were planning to spend a lot of time in said chair, we would need a place to put our beverages, books and whatnot. So, I ordered a cheapie little unfinished table from Amazon, and opted to paint it bright blue. It's functional but colorful - and easily repainted if the kid doesn't like it in the future. We chose a turquoisy/tealish shade that kind of matches the floor pillows, the mat for the map, and the mobile - and I guess is becoming the dominant color in the room. You really shouldn't pick paint based on its name, but we found a perfect shade called Mermaid's Treasure and couldn't resist.

cute little side table all painted and ready to go

So, we've got a whole bunch of furniture, fun accessories and decorations. There are a couple more small things to do, but this room is already way more finished and cooler than any other room in the house.  We are both very very anxious move things in and see how this all fits together. 

Thursday, March 19, 2015

Walls and Trim

Once everything was out of the office, we could finally get started on the minor renovations we had planned. We knew we wanted to take this opportunity to refinish the floors, which badly needed it, before the new furniture gets in the way and the kid arrives. It doesn't really make sense to do the floors for just one room, so we decided to redo the entire upstairs at once. But before we have our floors refinished into beautiful, fabulous floors, it makes sense to touch up all the paint to ensure that nothing gets dripped on them in the future. So, what was a small project of just touching up paint in a couple spots in the kid's room, turned into a major project of patching walls, touching up paint, and fixing up all the trim upstairs.

Step 1. Patch  & Paint the Walls
When we first moved in, I quickly painted all the walls to get rid of the really horrendous colors that we inherited from the previous owner. Because I was in a hurry, I didn't do a very thorough job. So, I went back to take the time now to patch cracks and holes. In all of the rooms, there were cracks along walls and at the tops of the doors and windows that formed as the house settled over time. I quickly patched them with a light coat of mud, and then painted.

patching cracks in the bedroom

Our house has been wired for cable several times, so there were a bunch of cables and outlets that didn't actually connect to anything anymore - so I pulled all of those out and patched the holes.

one of many useless cables running through the upstairs that got pulled out

patching over one of the old cable outlets in the green room

After I had patched and painted everything, I realized that the store had mixed the wrong color for the green room. So we had to take a second trip way out to the suburbs to get a new can of paint for the green room, and then I repainted again.

ak. definitely not the right color in the green room

after another coat of the right color - looking good again

Step 2. Replace the Outlets
An ongoing project in the house is to replace the nasty old yellow outlets with new bright white ones that disappear into the white trim. Since I was repainting the trim anyway, I figured that now was a good time to do it. I just flipped the circuit breaker, unscrewed the old outlets from the wall, and then carefully moved the wires from the old outlets to the new white ones, putting the wires in the same relative places as I went. Now all the outlets upstairs are new, white ones.

Step 3. Fix up Trim
Once the walls were in good shape and the new outlets were installed, I started working on the trim. First up, I removed anything that needed to come off. I pried off the shoe molding, which will prevent the floor sander from covering the whole floor. I pulled out any remaining useless cable and phone wires, and then I scraped everything to get rid of old caulk, flaking paint and other gunk. I then carefully swept and wiped everything down to get rid of paint chips and dust. Then I caulked to fill in all the gaps and cracks, using a caulk gun to run a line of caulk along anything that needed to be filled, and using my finger to smooth it. Then the trim got a new coat of white paint, and the walls got a quick coat of wall paint to make a smooth line along the edge of the molding. Sidenote - caulk is important for filling in gaps and making things look finished, but if you don't paint it- it attracts all the dust and hair in the house and quickly looks disgusting.

Before: a bad spot in the green room

After: caulked & painted, shoe molding removed

Step 4. Remove Lead Paint in Kid's Room
So while I was working on the green room, the hallway and our bedroom, R was focused on the new kid's room. Our house was built in the 1910s, and lead wasn't removed from paint until 1978 - so we knew we had lead paint in the house. For added safety, R decided to take on the project of removing the paint from the trim in the kid's room. (Apparently he chewed on his windowsill as a kid- so this was personal for him). We bought a whole bucket of enviro-friendly stripper, and he started slathering it on. Not surprisingly, it turns out we have dozens of layers of paint on the trim, so it took him three different passes to get the window nearly bare.

stripper doing its thing on the window trim

Between the fumes and the mess, we decided this wasn't the best approach. So we picked up a heat gun (which is basically just a super powered hair dryer), and he used it to finish the window and remove the paint in the door frames.

husband finishing up the window with the heat gun

Once he was done, I came in and caulked and painted the window and closet door frame. In retrospect - removing the paint wasn't a great idea. Stripping the paint made a huge mess and was probably more dangerous than just leaving it in place and covering it will a new coat of fresh paint. Maybe a better answer would be to remove the molding altogether and replace with something new - but that's expensive and feels wrong in an old house.

Anyway - now we are finally done and everything looks great. We stayed up late a couple nights getting everything finished up. This was a monster of a project that ate away several of our weekends. It was completely back breaking and totally thankless-  the kind of project that no one will notice once it's been done. Already it's hard to remember how cruddy it looked before, now that everything is so much cleaner and sharper now. But we finished in the nick of time- the floor guys get started today, and we couldn't be more excited. More on that soon!

Monday, March 16, 2015

Emptying the Old Office and Organizing the Stuff

So I'm not really sentimental about stuff- I have no problem donating or trashing things I don't need and really prefer to have a small number of well-organized things than a large number of stuff. Spouso, on the other hand, likes to keep everything. I'm not going to say it's all his fault, but we definitely have a lot of unnecessary stuff that got stashed in the office over the years since we moved in. In order to put the new kid's stuff in the room, all the old office stuff had to come out - so it was finally time to do deep clean.

Step 1. Move Permanent Non-Office Things to the Basement
The office has a huge closet, so we used it to store a lot of things that aren't office related. Some things, like camping tents and backpacks we definitely wanted to keep. Other things, like a painting easel that I somehow acquired in the last few years, I knew I could let go. So, the first step was to pull it all out of the closet, quickly sort out the keepers from the non-keepers. We moved the keepers down to the basement storage shelves and the non-keepers to goodwill. We still have access to this stuff, which is protected from the weather, but we don't need them taking up critical closet space.

Step 2. Find Permanent Homes for Keepsakes
In that process, we found a number of things that were definitely keepers that couldn't be stored in the basement because they were too important. For example, I hadn't touched my wedding dress since it was stashed in the office the day after the wedding (almost 2 years ago). I was sort of paralyzed by the question of whether or not I should sell it, so I couldn't even take it to be cleaned. Thankfully, my resourceful friend Molly found a company that would take the dress, clean it, box it, and ship it back to me for pretty cheap. Now the box is back and will easily fit in the top of a closet, or until I finally decide to sell it (or not).
wedding dress finally got cleaned

Similarly, R had kept a stack of newspapers from the last time his team won the world series, (before we met, btw) that were meant to be framed, but just sat around for years. He finally sorted through them, picked the page to frame, ordered a frame online, and put it together. Now the newspaper can actually go on a wall somewhere.

Lastly, we had a large pile of cards, notes, and other bits that Spouso had kept from the past few years. They were stored in files and piles, which wasn't great. So we bought a box for sentimental things to go, now they will all have a place and be easy to find.

Step 3. Photo Book
After my grandparents passed away last year, I was really struck by how many thousands of photos they had taken, but how few photos there were of the two of them. So I started a new initiative to not only take more pictures of people during the year, but to also make an annual photo book that covers all the major (and some minor) events of the year. In it, I include a sleeve to hold whatever loose photos and ticket stubs and whatnot we've accumulated from the year. So, during one snow day, I parked on the couch, sorted through all of our photos from 2014, pulled out the best from each month, and uploaded them to Shutterfly to make a small photo book. (Sidenote, I only take pictures of my house projects, and R only takes pictures of Wally the Cat. Trying to find anything else was difficult-- must try harder this year). When the book arrives, we will tuck the loose stuff in the sleeve.

Step 4. Sort through Office Supplies, Eliminate Waste
Once all the sentimental stuff was taken care of, it was time to attack the rest. I started taking one armful of office supplies at a time down to the living room to be sorted. We both had lots of leftovers from college and grad school, but hardly use most office supplies now.  We pulled out all the trash, and then started carefully downsizing the stuff that was still good but unnecessary. For example, we had 5 different boxes of thank you cards, but only send a handful a year (crap, now I feel like I should be sending more thank you cards).  So we recycled the cheaper ones and just kept a single box of the nicer ones. This was a slightly difficult process because a lot of the stuff was fine, it'll just never get used (like 100s of flash cards or 3 packages of resume paper), so we had to be really ruthless - only the stuff that would really get used got to stay. Then I bought a couple office organizers to keep the keepers well organized and easy to find.

Step 5. Organize Files
During that process, I found all of our files. It's funny how we moved in together years ago and got legally married almost 2 years ago, but I keep stumbling on different things that are still separated, relics of our single lives. We each had two different filing systems with totally separate files- even though the papers being filed usually applied to both of us (like bills from the vet or mortgage agreements). It meant that we had totally duplicated each other and were keeping 2 sets of everything. So, one night I took all of the files out, combined the similar ones, shredded the unnecessary ones, and moved them into new, well-labeled boxes. Now our files are slimmed down and better organized, and we are just slightly more married.

Step 6. Upgrade the Printer
We both really hated our printer, which was old and clunky, took up a lot of space, took forever to warm up, and had lots of trashy cables dangling all over the place. Since we actually do use the printer from time to time, we took this opportunity to get a new one that would be a bit smaller, have an internal paper tray that didn't need to be loaded for each use, and could be used via WiFi, so no ugly cables needed.

To make sure the WiFi would work in the new office, which is on the other side of the house from the router, we bought a wireless range extender. It was super easy to set up, roughly $30, and now we have full connectivity everywhere in the house. People with big houses that have spotty wifi (parents, I'm talking to you), you might want to consider getting one of these puppies.

Step 7. Get rid of old laptops
We both had old laptops from our college/grad school days that were totally nonfunctional and needed to go. We took some time getting all the useful stuff off of them, then wiping clean. We donated the newer one to Goodwill which has a nice program to refurbish them and give them to people who need them, but we dropped the older one off at the landfill to be properly trashed.

Step 8. Move to the Sleeping Porch.
Last but not least, (well, probably least), we moved everything out onto the sleeping porch. This gave us one last opportunity to downsize and sort, and gave us a sense of how much storage space the new office will really need. Now the old office, which can officially be renamed the Kid's Room, no longer feels like an office, is totally empty, and ready to be fixed up.

a much smaller pile of office supplies

Thursday, March 5, 2015

Baby Blankets

I decided quite a while ago that I wanted to make baby blankets for the kid. I did some searching and found that strip quilts were pretty easy and awfully cute. I figured it would be personal and hand-made, and allow me to add some color and patterns to the room.

Step 1. Cut fabric into strips
I went on my favorite online fabric store and ordered 6 different quilt fabrics of coordinating colors, and 2 different colors of minky dot fabric for the backer. I cut the minky stuff into large squares, roughly 40" x 40", and I cut the quilt fabric into strips that were the length of the bolt (roughly 40ish"), and between 7-12 inches wide. Then everything got washed and dried and ironed. (The smaller the strip, the more likely it was to get completely mangled in the dryer - so the ironing took a lot of time). Then I took a couple strips and laid them on the table to plan out the set up.

freshly ironed strips get arranged on the table

Step 2. Sew strips to each other
Then I took two strips, pinned them face-to-face, and sewed along the long edge. Geometric designs made it much easier to sew straight. After I finished one, I would pin on the next and sew it on, until I had about 6 strips sewn together, roughly the size of the final blanket.

pinning two strips together

Step 3. Attach strips to backing
Once I had sewn enough strips together to be as big as the final blanket, I pinned the minky stuff face-to-face to the strips and started sewing along the edges. The minky stuff is really stretchy and fluffy, so it was kind of a pain to work with. Lots of pins were required to keep things flat and even. Once I'd sewn along three sides, I sewed most of the fourth side, leaving a couple inches open to flip it out.

Step 4. Flip & Handstitch
Then I flipped it right-side out. Using a needle and thread, I handstitched the last few inches that were left open. Then I added a few stitches in the middle of the blanket to keep the strips attached to the backing material.

flipping the blanket right-side out

hand stitching in the middle

Step 5. Repeat
I had to buy a full yard of each quilting fabric, so I had 6 yards to work with, but used only about 1 yard per blanket. So I made lots of blankets, trying to use up all the strips. Since they all look pretty much the same, this might be overkill, but I'm assuming that having extra blankets will be useful.

a finished blanket

a stack of four finished blankets