Friday, July 29, 2016

Shape Up-date: Good Habits and New Bags

Ok, so we are about a third of the way through my 15 week shape up, and have arguably gotten through the hardest part. With any new goal or resolution, the first couple of weeks are the time to either make new habits that will stick, or get derailed and go back to the old habits (which is what usually happens). So, while I have been getting moving and getting back on track, I've mostly been focused on identifying the things that will trip me up and finding solutions to make this easier on myself, so that I'm more likely to continue.

1 - Get a Plan
When I set this goal, I was planning on running a very popular, long-ago-sold-out 10 mile race in October, falsely thinking that I could get a bib through work. When a helpful colleague dropped that bomb on me, I scrambled to find a new race around the same time. I know that signing up and paying for a race is a strong incentive to keep me on track, and that I have to strike the perfect balance of long enough that I will be scared into training for it, but not so long that I set myself up to fail. There aren't a lot of races in the fall, so my only options were a 5-miler and a half marathon, which is a bit more than I wanted to do and earlier than the 10 mile race I intended to train for. So - after some noodling, I decided to go for the half and quickly googled a training plan to get moving (I'm doing the Hal Higdon one here). It is only a 12 week training plan, so I only missed the first day.  I printed it off and stuck it prominently on the fridge - a sure sign that I have to stay on track.

Once I had a plan, I added appointments to my work calendar to remind me to go run or to yoga, as specified by the plan. Now that it's a million degrees and humid like a Turkish bathhouse, I'm having to get creative about running outside. I started running to work in the morning, which comes with lots of additional complications, and trying to run on the weekends before the boy wakes up or on my sleep-in day (which sucks when I really just want to sleep in).

On the food front, my plan is to eat roughly 1200 calories per day,  making as much of my food from scratch as possible. In order to stay on track, I started working through my known downfalls:
  • For breakfast, I run out of time in the morning and end up buying gross food at work, so I found some recipes and ideas for things that could be made in advance and then just grabbed quickly in the morning (Here and Here). 
  • I have the same issue for lunch, and usually don't have time to even move food from a large bowl to a smaller container - so I searched for some lunch ideas to prep over the weekend or the night before that I could just grab in the morning (lots of good ideas here). 
  • I know that if I eat lunch at noon, I'll be starving around 3 and make bad decisions, so I've been pushing breakfast back a couple hours so that I can push lunch back a couple hours, and not go ravenous before dinner. 
  • Lastly, I know that when it's my week to cook dinner, I always completely blank on what to make - and usually end up cooking the same 3 pastas over and over or just buying takeout. So we're trying out some meal planning services in hopes that we start eating real meals that meet some nutritional goals (like being vegetarian and eating seafood once a week), instead of our recent norm of scrounging for PB&J after the kid goes to sleep.
  • Very lastly, knowing that we often have too much going on during the weekend to get to the store, I finally downloaded the Instacart app, so I can just feed the grocery list right in for quick grocery delivery.  
2 - Get ALL the Gear
Once I had a plan and got started, I realized I was missing lots of important things. Though I'm generally a minimalist in everything else I do, when it comes to healthy stuff, I want all of the gear - any possible invention to make it just a bit easier on myself and remove an annoyance or inconvenience that will derail my good intentions. Thankfully, over the years, I've now accumulated quite a bit of gym stuff - like a running water bottle, running sunglasses, armband and earbuds, and yoga-mat-sized towel that work (but smell SO horrible). So for all that stuff that I already had, the trick was just getting it all to the right place - remembering to haul it to work for the week and back home for the weekend.

For the stuff that I didn't have, I did some quick shopping. I got a new pair of running shoes from Amazon and raided the cheap gym clothes section at Target to ensure that I had enough stuff to get me through the week without needing to do laundry. Similarly, on the food front, I bought a new lunch box that's big enough to hold all the food I need for the day, nice glass food containers that won't leak, and some reusable ice packs. I just got a nice, new coffee thermos for Christmas, so I'm all set on that front.

3 - Make Backup Plans
As soon as I made a plan and got started, I quickly got derailed. Planning to run over my lunch hour - forgot my shoes. Brought my boring lunch to work - colleague invites me to join her at a tasty restaurant. Planning to run outside - we're having a "heat emergency" caused by something called a heat dome. Thing after thing keeps occurring, totally derailing me and throwing my good intentions out the window. So, even though the goal is still to stay on the plan, I came up with some backup plans for the just in cases. For food - I scouted out some healthy lunch options in case I need to buy food, and picked up some decent frozen things for the days when I'm too lazy to cook dinner that should prevent me from getting much-worse takeout. For exercise - I set up my old yoga dvd for the days I fail to make it to class, and brought a spare pair of clothes and shoes to the office as a backup.  I start each week with my weather app, looking for the days that it'll be cool enough to run into work, and adjust the schedule as needed.  On days that it's too hot to run outside, I can do short stints on the treadmill.

4 - Make New Tote Bags
If it isn't already apparent - one downside to this plan is that I'm now hauling a lot of stuff to and from work every day. Most week days, I'm carrying gym clothes, my lunch, breakfast, and coffee to and from work. Some days, I have all that, plus my gym shoes, water bottle, and yoga towel. The day before running to work, I also bring in all the work clothes I will need. In short - I'm carrying a whole lot of bulky, heavy, and often dirty stuff around.

what I carried to work today:
breakfast & lunch, gym clothes & shoes, work clothes for tomorrow

I have been using some free canvas bags, but they aren't great. They don't have pockets, so everything just falls over and gets mingled and lost at the bottom. They don't have zippers, so things can fall out and be seen by anyone. Plus, they're pretty schlubby and not particularly professional looking. So, of course, I decided to make my own. The goal was to look roughly like this fabulous one on etsy, but to be entirely machine-washable, with lots of pockets to hold stuff, and a zipper to keep things closed.

Step 1. Prep the Fabric
I bought a couple yards of sturdy canvas and drapery fabric, plus a few long zippers and matching thread. Throw all the fabric in the washer and dryer to preshrink, and then iron. Out of the exterior fabric, cut the exterior panels, handles, pockets, and zipper connectors (more on them later).


Step 2. Make the Exterior Panels
Because I wanted the exterior of the bag to be made with two different fabrics, the first thing to do is sew the two pieces together to create the exterior panels.


Step 3. Make the Pockets
Next, we make the pockets. To avoid adding too much bulk, I just added one pocket to each side. Also - pockets that are too wide will just fall open, so I cut them in half or in thirds, depending on what I wanted them to hold.


Step 4.  Make and Attach the Handles
Next we make handles, since this is a tote bag. The length of the handles should be about 28-30", so you need to sew down based on the total length of the fabric strip.


Step 5. Make the Zipper Connectors
Through trial and error I discovered that we want an extra piece of fabric to separate the zipper from the exterior fabric, otherwise the weight of the bag pulls the zipper apart. So, next we create what I'm calling "zipper connectors", which are two small pieces of fabric that will connect the zipper to the exterior panels, and look a lot like a hotdog in my picture below.


Step 6. Attach Exterior Panels to the Zipper Connectors
I'm guessing that many (most) tote bags don't have a zipper because it gets complicated at this point. However, if you go slowly and just make sure all of your fabric is facing the right way - this is not hard. This should result in all of the fabric being connected to the zipper. Make sure you leave the zipper half open at the end (or you won't be able to flip the bag at the very end).


Step 7. Sew the Panels Together
So now the panels are attached to the zipper but not each other, so we need to sew the bag together.


Step 8. Sew Box Corners
This is an extra fancy step that you can skip - but it makes the bags look much nicer and sort of stand up on their own. My little drawings aren't great at expressing 3 dimensions - so work with me on this step.

Step 9. Extras
So, as I mentioned before, it was important to me that everything be machine-washable - but I also liked the idea of having some leather accents. So I found a store on Etsy that makes leather straps and keychains, and had them make some leather pulls that could be removed when the bag needed to be washed.

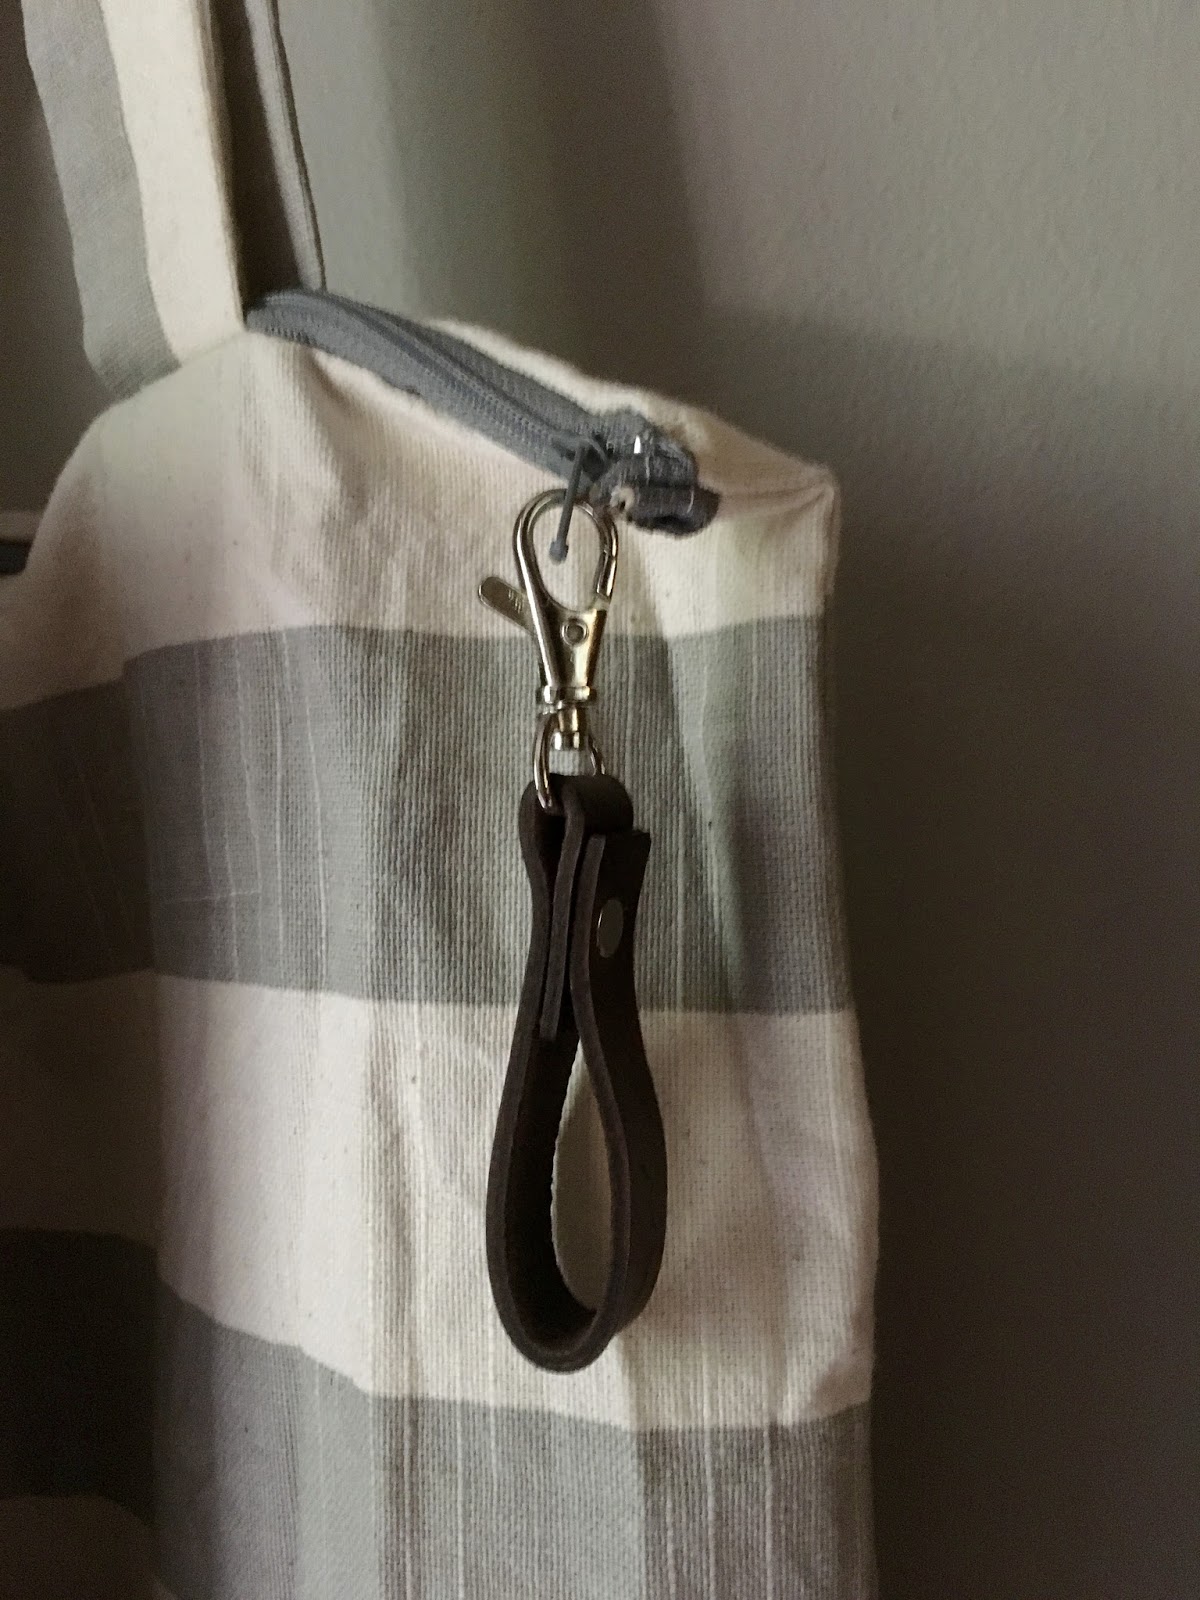
closeup of a leather zipper pull

Then (as if this post weren't already long enough), I decided to make a couple more bags, following the same basic design. I made a couple smaller bags for the days I need to carry less, and then a larger bag for carrying towels to the pool (which we are now doing every week!). I also made a couple really small bags to carry my phone and cards, perfect on days I run to work and don't have my work bag with me or to throw into the diaper bag for the morning commute.

new totes and pool bag

new little bags, just big enough for my wallet and phone

So - I'm not going to say that it's going perfectly. I have definitely missed some runs and fallen off the healthy food wagon - but 5 weeks in, I'm still committed to my goal and working to stay on track. A lot of things are getting easier, I've found that yoga classes don't hurt anymore, and I'm slowly getting a bit faster - but I also have a long way to go. I will keep trucking along, and next up - we'll talk more about progress on the house.

Friday, July 22, 2016

Progress in the Halfbath, Mudroom, Dining Room, and Kitchen

So, to kick off our big 15 week shape up - we reached out to our contractor to get started on some of the projects that either we can't do ourselves, or we could do but were having trouble finding the time to do. They've been working for the past 3 weeks and just finished up. We had them do just enough to make it easy for us to finish the spaces all the way off. First - a quick reminder of what these spaces looked like at the start:

exposed pipe in the kitchen above the cabinets

exposed beam and plywood floor between the kitchen and dining room

the old back door and view of the mudroom

mudroom with plywood floors and insulated walls

The Kitchen
When the washer/dryer was installed upstairs, the previous contractor ran the drainage pipe down the wall in the kitchen, but didn't cover it up. These guys framed the pipe, so that we can come back and add sheetrock to cover it up.

exposed pipe is boxed in and ready to be sheet rocked. 

The Dining Room
Similarly, the previous contractor left the ceiling open when they took down the old wall between the kitchen and dining room and installed the new beam - which is also open and ugly. These contractors framed it, so that we can come back and add the sheetrock. They also replaced the plywood filler that covered the spot where the wall used to be with an actual wood transition.

exposed beam is boxed in and ready to be sheet rocked

new transition from the kitchen to dining room floor

The Halfbath & Mudroom
The majority of the contractor's time was spent in these spaces. First, they fixed the plumbing so that it vents all the way to the roof, instead of just inside the wall. Second, they added wiring for new outlets and installed overhead lights. Third, they added some framing so that they could sheetrock and mud it.h Last, the plumber added hookups for a new radiator to heat the spaces, which they will come back and install once we do the floor.

new view from kitchen to mudroom

half bath all sheet rocked

new jellyfish light in mudroom

radiator hookups - ready and waiting.

The Sleeping Porch
We decided not to have them finish this space in order to reduce costs, but they did have one small project up here. Because the halfbath toilet needed to vent properly, they installed a new pipe going up from the halfbath, through the middle of this room, and up to the roof. Eventually, this pipe will be covered the wall that will separate the office from the master bathroom - but for now, we're just going to have to try to cover this up and make it look less ugly.

new vent pipe through the sleeping porch. mmm. 

The Add-on Project
So, every time we use a contractor for any project, we negotiate and edit the contract down in scope to get it as small as possible, and then inevitably, as soon as they get started, we realize we need to add more things and expand the scope. (I'm sure they just love this). So, this time, we opted to do the demo ourselves to remove the old back door, window and fan. As soon as we did, we realized that we wanted all of the brick removed so that it could be as open and breezy as possible, but removing walls of brick is really beyond our abilities. At this point, they had already started framing the mudroom for sheetrock, so it wasn't the best time to add additional demolition work. But, in the process of taking the door out, we realized that the header supporting the brick overhead wasn't really supported anymore, so it needed some additional work that was beyond our scope. Thankfully, this only added on an extra day or so - and it looks so much better. The mudroom area already feels infinitely more connected to the house, and the kitchen feels more open.

after we took out the doors and windows - realizing there was still brick in the way. 

they remove the rest of the brick and add this nice beefy support

The Electrical and New Discoveries
We have a 100+ year old house, which means that whenever we do anything, no matter how small, there's a really decent risk that we'll discover some other problem or break something. One day, the team was working on removing the electrical connection for the old fan above the kitchen door, a relatively small electrical project, when our tenant alerted us that some of his outlets were no longer working in the basement. About half of the house, including appliances on their own circuits, no longer had power, during one of the hottest heat waves of the summer. Several days went by, and the contractor was unable to figure out what had happened, leaving us without electricity to most of the important parts of the house  (no oven, no washer/dryer, no air conditioning). We were not happy about it, but doing our best to remain flexible and work around the situation as best we could. Eventually, an electrician was able to determine that we were part of a neighborhood-wide power outage, which blew out one of the two lines that feed our house - meaning that it was not at all related to the renovation and just completely coincidental. The power company came out and fixed it quickly.

...

Similarly, since the contractor was going to be sheetrocking in this formerly-exterior space, we pointed out that it sometimes leaked during heavy rain, and asked him to check it out. Turns out that the exterior wall has a massive hole in it, just above all the new sheetrock and framing. We could never see it because it's right on the property line. Now that we know it's there, we need to find a cement specialist to fix it, but hopefully it can wait a little longer.

big hole in the cement just outside the mudroom wall. grim, no? 

Lesson learned - always leave room in the budget for additional projects that might pop up, either because you realize you want something else done, or a problem arises.

just a reminder of where we started. 

Next Steps
So the contractors are essentially done now, and it's our turn to finish these space off. We're going to finish the mudroom floor so that they can come back and install the radiator. After the mudroom and half bath are done, we'll come back and finish up all the remaining sheetrock and painting.

Tuesday, July 12, 2016

Introducing the Half Bath and Mudroom Project

Okey dokey - so part of our big House Shape-Up plan is to finally close in and finish the halfbath/mudroom area. We have contractors on site shoring up the structure, plumbing and electric in this space, so we've been busy planning and shopping to figure out what we want these rooms to be.

First, let's do a quick review of how these spaces got to where they are today. When we bought the house, this was a large pantry off of the kitchen, which was next to the back door that opened out onto a small back porch and the brick steps down to the yard.

the old pantry 

pantry door - view from the kitchen

Then, during the Great Renovation, we hired a team to knock down the pantry walls and close in part of the old back porch, moving the back door back to the edge of the porch floor. 

the new floor plans for the Great Renovation of 2014

on the back porch, the wall of the pantry comes down

from the back - the new half bath gets closed in and the new back door is moved

the back door gets moved to the other side of the old back porch, creating a new mudroom

the half bath gets a window

Then the team started pre-plumbing the area so that it would be ready to turn into a half bath, but stopped there. About a year later, we got desperate for a spare toilet while our upstairs floors were being refinished, so we added the toilet, but nothing else. 

the half bath gets partially plumbed 

new toilet really finishes the space up. 

Lastly, not really part of these rooms but related - we had the old brick steps removed and replaced with fancy new metal stairs in order to give us a landing area to make it easier to get in and out of the door, fixing one of the unintended consequences of moving the back door out. 

old broken brick steps are replaced with these fancy new ones

So - that's where these spaces have been for the last few months. They are the dumping grounds for a lot of junk, including the pantry, a massive pile of shoes, and lots of other random stuff. Obviously, they could be much more functional and attractive, and with the plywood floors and open ceilings - they could be a lot safer for the boy.

Since both rooms are so small and right next to each other, we're going to renovate them together with the same overall design plan. The goal is for the two rooms to be light and bright, and look like they've always been there. The mudroom will flow into the future kitchen, so we want to keep that design in mind so things don't clash. They should be consistent with the rest of the house, so we want  the same dark wood and metal accents that we have going elsewhere, plus some blue because I love blue.

Here's the design plan:


  1. A glassy and bronzey pendant light for the mudroom
  2. Some fabric for curtains and fouta hand towels
  3. Oil-rubbed bronze fixtures for contrast
  4. A removable wallpaper
  5. Wainscoting for character
  6. Penny tile for the floor
  7. A white pedestal sink
  8. Some serene but interesting artwork
  9. A live-edge shelf
Workwise, there's a lot to do, and we are going to do as much of it ourselves as we can, with some contractor help to get it finished as quickly as possible.
  1. The contractor will install a radiator to heat the spaces and fix the plumbing so it vents properly. He will run electric lines for new overhead lights and outlets in each room, and also sheetrock the walls and ceilings. 
  2. We will then paint the ceilings, and maybe add wainscoting and wallpaper. 
  3. We will then tile the floor, in something that won't be slippery if wet. 
  4. Then we will hang the pocket door and add trim. 
  5. Last, we will install the fixtures and accessories.
The goal is to finish this up as quickly as we can so that this is a functional space, and the house doesn't look like it's under construction anymore. 

Monday, July 4, 2016

Finishing the Back Porch

Ok- so first up on the shape-up plan is finishing up the back porch. (Background on how this space got to where it is, here and here.) Now that we've started using it pretty regularly, the peeling paint on the ceiling and handrails has become a glaring disgrace that needed to be fixed. So, using some weekend naps and a couple week nights, I finally tackled this miserable project.

peeling paint on the ceiling

peeling paint on the handrails

 Step 1. Scrape the Peeling Paint
Using a painter's tool and a step stool, I got to work scraping away the peeling paint on the ceiling - which is horribly miserable work to do because the paint flakes just keep falling in your eyes. And then if it's hot (which of course it was) the paint chips stick to you and it's just horrible. Once that misery was done, I was much happier to get to work scraping the handrails smooth, using a sanding block to get all the flaking paint off. While I was there, I decided to grab a hacksaw and remove the curlicues on the handrails, which were no longer all-the-way attached anyway. Then I just swept all the paint chips away, and hosed down the whole area and let it dry.

curlicues that were only halfway on

Step 2. Repaint
For the ceiling, I rolled on a new coat of stain-blocking ceiling paint. Again, working on ceilings is miserable because stuff is constantly falling in your eyes, but this was relatively easy because it was such a small space. Once it was done - I pulled out a can of black spray paint for the handrails. I don't often use spray paint and probably would have preferred just a can of paint to use instead, since I lost so much time trying to cover and protect everything - which still didn't work very well. The only nice part was that it took like 5 minutes to spray everything once the area was all covered and prepped.

newly painted ceiling - no more paint flakes

newly painted handrail - all shiney and non-flakey

no more curlicues

Step 3. Touch up the Floor
Well, not surprisingly, it was a mistake to start this project by painting the floor before painting the ceiling and handrails. I dripped ceiling paint and over-sprayed the handrail paint, and ended up messing up my floor. So I quickly grabbed a brush and touched up the key areas, making the floor nice again. I figured another coat of paint would only be helpful anyway.

yipes. obvious advice: paint the ceiling before the floor. 

Step 4. Make Privacy Curtains
So, then I opted to make some curtains to give us privacy from our neighbors, who come and go often through their back door just on the other side of the handrail. Since it does get a bit of sun, I picked a sunbrella fabric in a fun blueish grey color, and just made simple unlined, grommet drapes. To keep them from blowing all over the place, I made tie backs using leftover velcro. I hung them with a standard tension rod (shower curtain rod), so that we didn't have to drill into the brick. The only trick here was that I was using a much heavier, outdoor fabric so my cheapo sewing machine struggled a bit on some of the seams - but going slowly and backing into the thicker seams worked great.

you just can't complete a sewing project in this house without help from Wally.

tie-backs with velcro

new curtains up and looking great

Step 5. Install Exterior Outlet
We have a team of contractors on site working on other stuff in the house (which I'll fill you in on next), so we asked them to add an outlet for the porch while they were here. So while we sat in nicely air-conditioned offices without any paint chips or dirt falling in our faces, they installed a lovely outlet that is mostly hidden from view - which will allow us to string up some fun lights to brighten the space at night.

new outlet - tucked behind the plant ladder

So, now this porch is officially finished. There is no flaking paint in sight, so I feel ok about the boy being out here. And since I no longer see a long list of to-do's when I sit out here, we can definitely enjoy it as well. The only other fix I would like to see is nicer patio furniture - but we can wait on that. Moving on - I'll update you on what the contractor has been up to, and then we turn our efforts to the sleeping porch.

no paint flakes to be seen

plant ladder in all its glory

oh- and happy 4th - cuz this definitely happened.