Showing posts with label carpentry. Show all posts

Tuesday, May 30, 2017

The 2nd Birthday: A Kitchen and a Construction-Themed Party

So we are super excited to get started on the big renovation projects, more on that soon. Meanwhile,  our kid just turned 2. Not only was that surprising and shocking in many ways, but it meant that it was time for another birthday party and an over-the-top birthday present. Last year really set the bar when I made a book that took a month to complete. (He still really likes it, btw). So this year, the plan was to give him a play kitchen, since he loves to pretend to cook, but to fix it up super spiffy, as a small scale replica of our future kitchen. One weekend a couple weeks ago, we swung by Ikea and picked up their Duktig, and then I got to work.

the Ikea Duktig

Step 1 - Countertops
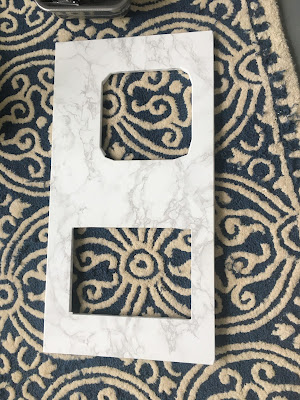
The first thing I did was to cover the countertop in faux-marble contact paper. I didn't do a great job though, and left a bunch of bubbles, so I eventually stripped it off and did it again more carefully, using a credit card to smooth as I went.

the original piece was unfinished wood 

covered in contact paper - looking nice

Step 2 - Appliances
The basic model has white doors for the microwave and oven, which is just not good enough. I taped over the "glass" part with painter's tape, and then just spray painted them with silver spray paint to make them stainless steel.

microwave and oven doors ready to go

getting painted in the back yard

Step 3 - Painted Cabinets
The basic model also has blond wood for all the rest of the cabinets, which is definitely not our color scheme. So we picked up two quart size paint cans, one dark blue and one white, to paint the bottom and top cabinets respectively, to create a two-tone tuxedo cabinet look.

the blue bottom cabinet, coming together

holding down a blue door
Step 4 - Handles
The box comes with plastic handles that felt sort of clumsy and chinsey - so we grabbed three new handles (5" set) to upgrade the others. Unfortunately, none of the screw options fit, so we ended up having to run out again to get the right size of screws to attach them to the doors (#8, 3/4 inch FYI).

nice new handles on the doors
(if you look close - you can see a nice cat print on the blue door)

Step 5 - Oven Knobs
One more easy add was to attach a couple knobs to the front as oven knobs, though I'm a little concerned that this will encourage him to play with the real oven knobs.

three oven knobs going on

Step 6 - Hinges
One thing I wasn't thrilled about was the way the two bottom cabinet doors opened. Both were predrilled to have handles across the top (good for the oven, weird for the cabinet), and to open out sideways (good for the cabinet, weird for the oven). So, we turned the cabinet door 90 degrees so the handle would be vertical (the door is a perfect square, so it still fit on the spot perfectly), and then redrilled the holes for the Ikea hinges. We wanted to add a hinge to the oven door so it would open down, but realized in drilling the other door that Ikea furniture isn't super resilient - it's just pressed sawdust - so we were worried about drilling more and scrapped the idea.

Step 7 - Accessories
I had plans for something grander involving a pot of herbs, but instead ran out of time and just settled with placing some play food and cans in with pots and pans and a bunch of bows.

all ready to go

Gift Time
So after slowly poking at this project every night for a couple weeks, it was finally ready to go. We snuck it down into place the night before his birthday. Once he woke up, we tried to play it super cool, and casually brought him into the living room, waiting for him to discover it. Once he did - he was very excited, and spent at least an hour opening all the doors and looking at all the food and pots and pans - it was a huge hit.


The Party
So, later that day, we got ready for a small party. The goal was to be a little lower key than last year, with just family and all food that would be made in advance, so no one would be in the kitchen during the party. We made a BBQ pork shoulder because it could be mostly done in the slowcooker the night before. I made a bunch of cold salads (a pasta, a cole slaw, a spinach salad), because they could all be made during the nap and eaten room temperature. I still ended up in the kitchen a bit, making an unnecessarily complex pitcher cocktail and arranging things on serving dishes, but mostly it was a success.

dinner coming out - mostly cold salads and BBQ sandwiches

enjoying the meal with family at an adults table

the little porch serves as an excellent kids table

For decorations, we went with a construction theme, out of his love for construction cones and diggers. During naptime, I put up some yellow and orange streamers and balloons, which always make a huge impression for not much money. I also picked up some cheap cones and rings to place ring toss, meant to be a cheap decoration, but he's pretty excited about the cones staying as a permanent toy now.

balloons and streamers coming down from the skylight

more streamers and balloons around the house

enjoying the balloons and decorative cones

My pride and joy (you know, other than the kid) was the cake. I went a little pinteresty on it. It's a two layer (top layer is smaller than the bottom layer) chocolate cake, with a ramp going from the bottom layer to the top. I added a few small construction vehicles driving up the ramp, and lifting crushed oreos into a dump truck. It's small and dark, so it's not super obvious what's going on, but he was pretty excited about it.

my cake

a closeup of the bulldozer on the ramp

cake passing the important test

 All in all, it was a pretty big success. He is very excited about the kitchen and the party, especially all the orange cones. So, inevitably, the two got combined when he decided to wash all the cones in the sink.

Monday, October 3, 2016

Finishing the Trim in the Halfbath and Mudroom

So, once the pocket door was finished, we could finally finish up the remaining trim.

Step 1 - Baseboards
With the door casings up, we could add baseboards around the mudroom and remaining halfbath walls.  We went with the tallest baseboards we could find to match the rest of the house.

baseboards go up in the mudroom

Wally demonstrates all the new baseboards

Step 2 - Beadboard Panels 
With the baseboards in place, we could cut down the remaining beadboard panels for the halfbath. We had already put up a couple of them, and just had a few small panels left on either side of the door.

Step 3 - Chair Rail
Once the  bead board panels were all up, we cut chair rail using 45 degree angles in the corners, and then nailed it up.

Chair rail and panels are up


Step 4 - Caulk and Paint
Once it was all attached, I came back with my paintable caulk to fill in all the holes and gaps. Then it all got a coat or two of paint.

everything gets caulked and painted

So, on the list of major upgrades to a room under renovation: 1) putting up sheetrock makes a huge difference over exposed framing and insulation, 2) putting down tile/flooring makes a space look and feel a lot more finished and clean because it covers up the subfloor, but 3) putting in trim really makes a huge difference by covering up the last of the holes and building materials and making a room feel fancy and finished.

These spaces have come a long way, and feel so much infinitely nicer and more finished than when we started. This project is like 92% done, which is always the hardest part for me, because I'm already starting to mentally move on to the next project. We are gathering our strength for a final push to the finish-  we just have a few small things to fix up and little accessories to add, and then these spaces are really really done.

Monday, September 19, 2016

Trim for the Halfbath Window

We're rolling right along on the halfbath and mudroom and are ready to finish up the trim. Next up - finishing up the little window in the half bath. Quick background -  the contractors framed in this wall and installed the window, but left it unfinished. After a bit of googling around, I figured out how to trim it out. (This Old House tutorial here.) (Note: preemptive apology for crappy photos - it's really hard to take a pic of a window when it's light outside).

where the contractors left off

Step 1 - Clean it Up
Using a utility knife, I quickly cut out the excess spray-in insulation and sheetrock so that everything is flush, even and smooth.

cleaned up and ready for trim

getting inspected by our littlest family member

Step 2  - Window Jams
So, first up, we cut the jams for the sides and top of the window. Unfortunately, our window is just slightly too deep to use the standard jams, so I used a couple 1x8 boards. First I cut it down to length, and then put it in place, marked the overage, and then rip-cut the board down to the right width. With our brand new table saw, it was super easy to set up the guard thing to the right size, and then just woosh the boards through. I cut the two side boards first, nailed them on, and then cut the top board and nailed it on.

Step 3 - Window Sill
So, the next thing to go in is the window sill and it is by far the most difficult piece. Home Depot sells special molding boards for this (actually called a window stool), which are rounded over on one side and nice looking. Again, our window was slightly too deep for the board, which put me in a weird spot, so I decided to first cut and install this board, and then cut down a smaller filler board to cover the gap. So, first, you have to decide what kind of casing will go around the window, because the sill will be just a bit bigger than the finished and trimmed window. Since this window is right against the wall, we didn't have room for anything bigger than the standard 2 1/4" window trim. So, first, we cut the window sill down lengthwise, it should be the width of the window + 2x the width of the casing + 1" overhang. Next, we need to notch out the walls, which are the depth of the window by the width of the casing + 1/2". (just see my diagram below- this is hard to explain.) Once I had the sill cut, and a second skinny board of the same depth to fill the gap - I just nailed them down.


jams and sill

Step 4 - Casing
Now we add the casing, using 45 degree angles to frame around the top and sides of the window, resting on the window sill.

Step 5 - Apron
Last, the underside of the sill gets fitted out with more of the casing, turned upside down. I used 30 degree angles for the ends. Then, we didn't like how it looked because it seemed like too much molding for such a small window, and more importantly, the sill didn't overhang enough to cover my apron - so I ripped the apron in half, creating a much smaller little board that was small enough to fit under the sill's overhang.

casing and apron

So, I still need to caulk and paint everything - but I'm waiting until I can do all the trim at once - so hopefully that will happen shortly. The rest of the trim is almost done. Plus, I have an update on the personal shape-up plan - so stay tuned.

Monday, September 12, 2016

Finishing the Pocket Door

As I explained in my last post, after the tile floor went down, we should've installed the pocket door next, because all of the trim builds out from the door, and it's easier to install trim before there are fixtures in the way. However, we knew it was going to be really hard to do, so we just put it off and went ahead with the toilet and sink. Once they were installed, we finally had to bite the bullet and focus on the door. As expected, it was a total PITA, so I am really glad this is finally done.

Step 1: Find a Door
The track was installed in the wall by our original contractors a couple years ago, so all it needed was a door. We could've bought a new one, but didn't want it to look too different from our solid wood, super old doors. It turned out that the door to the closet in our bedroom, which we plan to remove eventually, was just about the right size, so we decided to use it. We removed the hinges from the door fairly easily, and then I took it outside to quickly sand it down and give it a coat of walnut stain to try to reduce the red color just a bit.

door to the closet in the master bedroom

Step 2: Find the Hardware
I know when the track was installed, there was also a bag of hardware to hang the door, but it long ago was lost. (We actually think it might be closed up in the wall behind the sheetrock. Fun surprise for a future owner!). Finding replacement hardware wasn't easy, since we had no idea what brand our track was, and they don't seem to be standard, and they really don't show the sizes for things. So after buying a couple options, one set finally fit in the track. We just screwed the hanging things into the door and put the wheels on the track.

Step 3: Hang the Door
This was the part I was dreading the most - but it wasn't all that horrible actually. Once the wheels were in the track and the hangers were screwed onto the top of the door, we had to lift the door up into the wheels. Of course, maneuvering a massively heavy door into the small little holes without being able to see what you are doing is just as fun as it sounds. Thankfully, this was successfully completed in about a half hour without smashing anyone's fingers.

door is hanging! 

Step 4: Fix the Frame
Once the door was hanging, we gave it a gentle push into the frame, hoping it would silently whizz closed - only to have it come to a grinding halt immediately. Turns out that when the contractors installed the sheetrock on this wall, they pushed the frame together - pinching closed the space where the door should go. So, after quickly debating whether or not it was important for the door to be able to open more than halfway - Spouso got to work trying to pull the frame back open from the outside. His answer was to try to find and remove the screws that attached the sheetrock to the frame, and then reattach them while putting a spare board inside the pocket cavity in place of the door, to push back on the frame and prevent it from being pinched closed. There was a bit of colorful language, but eventually it worked and we rehung the door and were able to gently glide it closed. Unfortunately, the door got rather scratched up as we tried to move it into the pinched pocket, so maybe I'll come back and refinish the door in the future.

Step 5: Install the Jambs
Now that the door works, we got started on making it look nicer. First up was building a door jam using a 1x8 board. Once we cut it down to the right height, we needed to rip it down to the correct width, but didn't have the right tools to do that. So we got a new table saw! It easily cut the board down to size. So, then we got a couple more 1x8s to cut the side and top jambs down to size, and then screwed them down.

door jambs getting attached

Step 6: Install the Casing
Lastly, now that the jambs were in - we could finally put up the casing around the top and sides of the door, inside and out. We picked up some fancy molding from a local mill place to try to match the really old stuff of the rest of the house. It's not exactly the same, but close, and should help the space look a little more consistent with the rest of the house. This was pretty quick, we just used 45 degree cuts to turn the corners. We did the back door at the same time, but had to rip the top board down because the molding was actually too tall for the room.

door casing is up on the pocket door

pocket door peaking out

back door has casing now too

Now that the door is finally, thankfully, done, we can finish up the rest of the trim. The end is very close!!

Thursday, June 2, 2016

Powerwashing, Painting, and Plants on the Porch

Ok, so we had the new dining room door installed a couple months ago, which suddenly gave us easy access to this charming little porch that we had been completely cut off from for the past 2 years. So now, of course, we want to be out there all the time, so we needed to fix it up.

the newish door to the small porch (from January)

The small patio and its newish door

peeling paint on the porch floor

1. Pressure Washing
The porch floor was painted years ago (badly), and the paint was really flaking off, which is annoying for a place that I want to be barefoot, but really not ideal for a crawling baby who puts everything in his mouth. So we rented a pressure washer to remove the flakes. Having never rented one before, I had the impression that this thing would instantly and magically power all of the paint off - which turned out not to be true. Instead, it could remove the biggest flakes, then I followed up with my paint scraper tool, and then sprayed it down again. After an hour or so, I had removed all the loose stuff, but there was quite a bit of paint left behind.

after pressure washing - no loose paint but still ugly. 

2. Paint
Since the pressure washer didn't remove all the paint, what was left behind was safe but ugly. So I grabbed a gallon of cement/garage paint, which is presumably meant to be outside and therefore hopefully won't flake off like the old stuff. First, I did one thin layer with a paint brush, and came back an hour later with a thick roller. It made the floor all one nice homogeneous color, though clearly where the old paint was left behind it looks bumpy. I'm hoping this is "texture" that will reduce slipperiness.

after the first coat of paint - all one color but not very smooth

3. Plant Ladder
Clearly, the next step was to add some plants to this area. I wanted some height and wanted to cover up the awkward little notched area where the old walkway used to be - so decided to build a plant ladder using scrap wood. I just took two 2x4s, cut a 15 degree angle in the bottom and a 15 degree angle off of the top so that they would lean against the house, and then cut a bunch of scrap boards that were all 1" thick but various widths to 15" long to be the shelves. I stained them all and added a couple coats of polyurethane to protect them against the water. Then I screwed them to the 2x4s, 1 foot apart. I bought a bunch of terracotta pots of various sizes and some shadey, drapey plants. In hindsight - I should have spaced them out a bit more than a foot (or gotten shorter pots), because tall plants bump into the step above - but it's no biggie.

plant ladder!

So, the painted floor and lack of peeling paint chips are a huge improvement, and I'm pretty proud of my plant ladder and its flowing greenness. As is to be expected, now that one major eyesore has been fixed- suddenly a new one pops out. It is now super apparent that the handrails are flaking and desperately need to be painted. Also, even though we like our neighbors, a little privacy curtain would be nice to separate our space from their back door. Plus, it would be great to upgrade the furniture - so maybe some of these things will happen next. For now, this is already much nicer and safer than it was before, and has already gotten a lot of use.

yay porch. 

Thursday, April 7, 2016

The Master Bedroom Closet and a New Wardrobe

A couple thoughts as spring settles in:

Hello, springtime. Let's talk about clothes. 
  1. Goodbye, Winter Clothes! I don't want to think about winter ever again. In fact, every year as soon as it gets warmish, I boldly take all my coats and hats and heavy sweaters and store them away, out of sight. This is partly so that I have more room in my closet to see the stuff I'm actually using, but also because I hate winter and I don't want to be reminded that it will eventually return. (Actually - it's supposed to snow in a couple days. [sigh])
  2. Hello, Spring Clothes! Just as the winter stuff is getting put away, the summer stuff is coming out of hiding. It's fun every year to pull out the things that were stored away a few months ago- something between getting a bunch of gifts and being reunited with old treasures.
  3. What fits? To make things more complicated, this time last year I was massively pregnant, so none of these spring clothes were getting worn. In fact, between being pregnant for 9+ months, and then spending another 9+ months slowly losing the weight, it's been a really long time since a lot of my clothes fit me. I boxed up a bunch of them to put them out of sight, and now I'm starting to dig through everything to figure out what I have and what fits now.  
  4. Less is More. One of the things I really liked about being pregnant was that I had a really tiny wardrobe (as in, number of items, not size of clothes). I refused to buy a lot of temporary clothes, so I literally only had about 5 outfits- which meant each day I knew exactly what I was going to wear. There are plenty of examples of smart people choosing to have a really small wardrobe to avoid wasting mental effort on trivial choices, so let's go ahead and argue that this is my intent, and not just being otherwise lazy and cheap.
  5. See what you've got. An important part of being organized is being able to see everything you have. You can easily group similar items, and then avoid buying duplicates and know if something's missing. One major issue my closet has is that I can't see what's in it. There's a clothing bar hanging in front of shelves, blocking them from sight. I have a tall dresser hand-me-down with really deep drawers that clothes seem to disappear into. Plus, there are boxes of extra clothes hidden under the bed and various other places - so I have no idea what I have because I can't see any of it.  
The current master closet is this whole wall long, accessed through the door on the left

View to the right: It's a long and skinny closet, with a hanging rod in front of shelves 

So - with all that in mind - I decided to turn my efforts to my closet and the clothes in it. You may remember that our big plan is to convert the current master bedroom, the spare room beside it, and the old sleeping porch into one big master suite. We started it during the Big Renovation, which is now several years ago, when we turned the closet of the spare room into our washer/dryer closet. That small step was a huge improvement for laundry - but a big loss for closet space. We lost a very useful closet that the Spouse Man had been using, so he moved into the Greenroom and I had to move into the closet in the master bedroom. Despite the fact that it's quite big, the closet in the master bedroom is long and narrow, making it really difficult to actually see what's inside - turning it into a huge blackhole for clothes. Our plan is to create a new walk-in closet in the spare room which will be more open and accessible, and to knock down the current useless closet - making the bedroom bigger. I decided to start on making the new walk-in closet so that I could get my wardrobe better organized.


The Long-term Plan for a Master Suite


Step 1. Paint.
I started out by repainting the future closet space. When we first moved in, we (I) picked a tragic shade of baby blue. Then, when the contractors covered over the old door to the old closet, they left the new sheetrock primed white. I figured the new closet needed to be as light and bright as possible, so I just grabbed a leftover can of the slightly off-white shade that we used in the basement.

the corner of the spare room at the start, needing a paint job

Step 2. Get Shelves and Brackets
I priced out the options for wire shelving units, and was surprised to see that they were more expensive than getting real wood - which seems much more solid and attractive anyway. So I ran over to the Depot, picked up some 1x12 boards and brackets,  cut them down to size, and gave them a quick coat of white paint.

Step 3. Install Brackets and Shelves.
Then my spouse very nicely agreed to help me install the new shelves and brackets, which was great since it's easier as a two-man job, and he's not really benefitting from this project just now. He's still using the greenroom closet, so this project is all about me (for now). We just drilled pilot holes to find the stubs, then screwed the brackets into the studs- and then just screwed the boards onto the brackets. We made one high shelf for rarely needed items, one accessible shelf for things I use often, with a hanging bar beneath it, and then one lower shelf for shoes. We added a mirror too, and moved the bookcase that I made for the old office into the space.

brackets going up, saucily

Step 4. Move Everything into the New Space
Very quickly, I moved all my clothes over to the new spot. I was overwhelmed and confused to see that I had so much stuff, knowing that I wear a very small fraction of said stuff. It was clear that I needed to get organized and get rid of some things.

so much stuff.

Step 5. Make a Wardrobe Design Plan
Following my appreciation for a super small maternity wardrobe and my affinity for making design plans before a renovation - I decided to create a capsule wardrobe, if you will. Before we renovate a room, I spend an inordinate amount of time making a design plan. The process is really helpful for me to figure out what we have that I like, what we need for function, and then what looks good and goes together. This takes way more time than you might expect, but it's totally worth it. Once a design plan is done, I have my marching orders - I don't expect to get everything at once (though I occasionally toy with the idea by putting everything in my carts at once to see what it would cost), but I know what to watch for sales and things to keep my eyes open for. I figured the same process would work for a wardrobe too.

So, I scoured my go-to online shops for items I liked, put them all together in a powerpoint slide, and then culled and tweaked until I had a good collection. I tried to build off of the things I already have and like, adding in the stuff that is missing. It's built off a strict color scheme, so that everything goes with everything. I tried to balance the number of items - having more shirts than pants, some long-sleeve and some short-sleeve, etc. I also tried to balance the types of clothes I need with the lifestyle I actually have, (ie, one thing for a date night, one thing for a big meeting, lots of things for the average work day).

My Wardrobe Design Plan
Top Row: 1, 2, 3, 4, 5, 6, 7
Second Row: 1, 2, 3, 4, 5, 6, 7
Third Row: 1, 2, 3, 4, 5, 6, 7
Fourth Row: 1, 2, 3, 4, 5, 6, 7, 8
Bottom Row: 1, 2, 3, 4, 5, 6, 7

Step 6. Cull Ruthlessly
Once I had set my wardrobe design plan, I went back and got rid of anything that didn't fit it. Anything that was outside of the color scheme was easy to get rid of. Next were the items that would definitely never fit again (I'm still losing baby weight, so I had to walk the fine line of keeping clothes that were slightly too small and would likely fit again, while ditching the clothes that were way too small and probably never fit to begin with.). Then I started working on shifting the proportions of things to more accurately fit my lifestyle - 5 black evening gowns were excessive, so I just picked my favorite one or two. It was striking to me how out of proportion everything was - I clearly like to shop for evening dresses and cardigans- you'd think I go to a lot more galas than I do. I had to ask myself, "Do I really need 5 blue v-neck sweaters?" (answer = no). I got everything down to a smaller number of clothes that I actually liked, that fit, and that went together. Everything that was culled went into a pile for goodwill (which will actually hang out at the house for a week or two in case i have second thoughts on anything).

Step 7. Shop with Purpose
Lastly, I had to pick up a few items that were missing. The design plan and culling process identified a couple items that were clearly needed, so I made a list. I did some targeted online shopping as things I had been eyeing went on sale, and then I actually went to the mall. I hate the mall, so I went during a weekday afternoon with a list in hand, knowing that I would be in and out as quickly as possible. I can't express how much I actually hate the mall - but there is value in actually trying things on sometimes.

all done 

from another angle

new use for my bookcase

lots of bins for gym clothes

the top shelf is great for things I don't need often

room between the hangers! 

a mirror on the other wall- framed by my race bibs

Concluding Thoughts:
Obviously the new closet isn't finished. This is only half the storage space we are planning on, and it's lacking some walls, doors, lights, etc. But, it goes a long way towards defining the space and figuring out the best layout for eventually finishing it. For now, this is a huge upgrade for my closet space and really allows me to see what I have. Plus, I'm now completely out of the closet in the master bedroom, so I can toy with the idea of just knocking it down to enlarge the room (perhaps a fun idea for a slow day this summer).

The whole wardrobe process really clarified for me that I have been shopping wrong for a long time. Clearly, just randomly ordering stuff that was on sale didn't result in a useful wardrobe - it just wasted money and left piles of randomness to take up space. I'm really embarrassed by the number of items that got donated with their original tags still on. So, now that I have a better closet space that allows me to see everything I have - I'm committing to being a better clothes shopper, knowing what I have and only shopping for what I need. The idea of a capsule wardrobe is to get down to just 37 items. I'm still way over that, but I made a lot of progress. I see this as more of an aspirational approach that will take constant work. While this is a project that will never be done, for now, it feels so much better knowing that I have a plan and a system in place.