the Ikea Duktig
Step 1 - Countertops
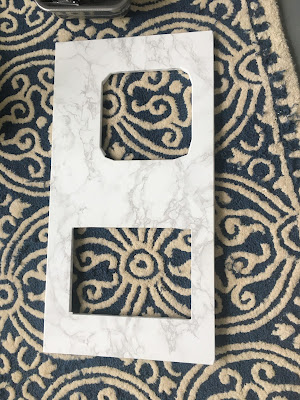
The first thing I did was to cover the countertop in faux-marble contact paper. I didn't do a great job though, and left a bunch of bubbles, so I eventually stripped it off and did it again more carefully, using a credit card to smooth as I went.
the original piece was unfinished wood
covered in contact paper - looking nice
Step 2 - Appliances
The basic model has white doors for the microwave and oven, which is just not good enough. I taped over the "glass" part with painter's tape, and then just spray painted them with silver spray paint to make them stainless steel.
microwave and oven doors ready to go
getting painted in the back yard
Step 3 - Painted Cabinets
The basic model also has blond wood for all the rest of the cabinets, which is definitely not our color scheme. So we picked up two quart size paint cans, one dark blue and one white, to paint the bottom and top cabinets respectively, to create a two-tone tuxedo cabinet look.
the blue bottom cabinet, coming together
holding down a blue door
Step 4 - HandlesThe box comes with plastic handles that felt sort of clumsy and chinsey - so we grabbed three new handles (5" set) to upgrade the others. Unfortunately, none of the screw options fit, so we ended up having to run out again to get the right size of screws to attach them to the doors (#8, 3/4 inch FYI).
nice new handles on the doors
(if you look close - you can see a nice cat print on the blue door)
Step 5 - Oven Knobs
One more easy add was to attach a couple knobs to the front as oven knobs, though I'm a little concerned that this will encourage him to play with the real oven knobs.
three oven knobs going on
One thing I wasn't thrilled about was the way the two bottom cabinet doors opened. Both were predrilled to have handles across the top (good for the oven, weird for the cabinet), and to open out sideways (good for the cabinet, weird for the oven). So, we turned the cabinet door 90 degrees so the handle would be vertical (the door is a perfect square, so it still fit on the spot perfectly), and then redrilled the holes for the Ikea hinges. We wanted to add a hinge to the oven door so it would open down, but realized in drilling the other door that Ikea furniture isn't super resilient - it's just pressed sawdust - so we were worried about drilling more and scrapped the idea.
Step 7 - Accessories
I had plans for something grander involving a pot of herbs, but instead ran out of time and just settled with placing some play food and cans in with pots and pans and a bunch of bows.
all ready to go
Gift Time
So after slowly poking at this project every night for a couple weeks, it was finally ready to go. We snuck it down into place the night before his birthday. Once he woke up, we tried to play it super cool, and casually brought him into the living room, waiting for him to discover it. Once he did - he was very excited, and spent at least an hour opening all the doors and looking at all the food and pots and pans - it was a huge hit.
The Party
So, later that day, we got ready for a small party. The goal was to be a little lower key than last year, with just family and all food that would be made in advance, so no one would be in the kitchen during the party. We made a BBQ pork shoulder because it could be mostly done in the slowcooker the night before. I made a bunch of cold salads (a pasta, a cole slaw, a spinach salad), because they could all be made during the nap and eaten room temperature. I still ended up in the kitchen a bit, making an unnecessarily complex pitcher cocktail and arranging things on serving dishes, but mostly it was a success.
dinner coming out - mostly cold salads and BBQ sandwiches
enjoying the meal with family at an adults table
the little porch serves as an excellent kids table
For decorations, we went with a construction theme, out of his love for construction cones and diggers. During naptime, I put up some yellow and orange streamers and balloons, which always make a huge impression for not much money. I also picked up some cheap cones and rings to place ring toss, meant to be a cheap decoration, but he's pretty excited about the cones staying as a permanent toy now.
balloons and streamers coming down from the skylight
more streamers and balloons around the house
enjoying the balloons and decorative cones
My pride and joy (you know, other than the kid) was the cake. I went a little pinteresty on it. It's a two layer (top layer is smaller than the bottom layer) chocolate cake, with a ramp going from the bottom layer to the top. I added a few small construction vehicles driving up the ramp, and lifting crushed oreos into a dump truck. It's small and dark, so it's not super obvious what's going on, but he was pretty excited about it.
my cake
a closeup of the bulldozer on the ramp
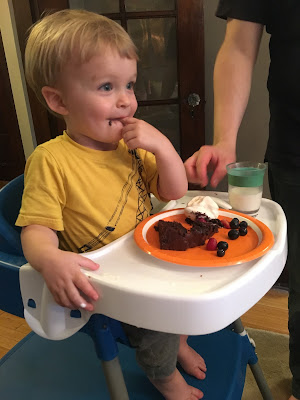
cake passing the important test


No comments:
Post a Comment