Monday, October 3, 2016

Finishing the Trim in the Halfbath and Mudroom

So, once the pocket door was finished, we could finally finish up the remaining trim.

Step 1 - Baseboards
With the door casings up, we could add baseboards around the mudroom and remaining halfbath walls.  We went with the tallest baseboards we could find to match the rest of the house.

baseboards go up in the mudroom

Wally demonstrates all the new baseboards

Step 2 - Beadboard Panels 
With the baseboards in place, we could cut down the remaining beadboard panels for the halfbath. We had already put up a couple of them, and just had a few small panels left on either side of the door.

Step 3 - Chair Rail
Once the  bead board panels were all up, we cut chair rail using 45 degree angles in the corners, and then nailed it up.

Chair rail and panels are up


Step 4 - Caulk and Paint
Once it was all attached, I came back with my paintable caulk to fill in all the holes and gaps. Then it all got a coat or two of paint.

everything gets caulked and painted

So, on the list of major upgrades to a room under renovation: 1) putting up sheetrock makes a huge difference over exposed framing and insulation, 2) putting down tile/flooring makes a space look and feel a lot more finished and clean because it covers up the subfloor, but 3) putting in trim really makes a huge difference by covering up the last of the holes and building materials and making a room feel fancy and finished.

These spaces have come a long way, and feel so much infinitely nicer and more finished than when we started. This project is like 92% done, which is always the hardest part for me, because I'm already starting to mentally move on to the next project. We are gathering our strength for a final push to the finish-  we just have a few small things to fix up and little accessories to add, and then these spaces are really really done.

Thursday, September 22, 2016

Time for Fall

So - summer has officially ended and fall has begun. I just finished my half marathon and its epic training plan. We are almost done with the half bath and mudroom projects. With lots of things finished or wrapping up, I am really ready shift gears and change things up. A couple thoughts:

1. Running the Navy Air Force Half Marathon 
I signed up for this race a couple months ago, in hopes that it would get me back in shape. Of course, as is always true for me, I had a hard time fitting in all the required runs and didn't end up training as well as I wanted. The more the mileage crept up, the hungrier I got - really throwing off my plans to eat well during this period. Old running injuries flared up, no doubt because I was adding miles too quickly while missing important strength training exercises - so I spent a good chunk of time on the couch, icing my knees with frozen vegetables (butternut squash is my new favorite). So - when the race day finally came, I finished it (which was my only real goal), and I did it much faster than I was expecting, but still slower than the last time I ran this distance 6 years ago. I was a little disappointed that I hadn't worked harder or run faster, but mostly I was just really happy to be done.

running into the finish line

in prior years - we went out to celebrate after a race. This year, I got a nap! 

2. New Exercise Plans
Whenever I finish a long race, I always feel torn between wanting to never move again, but not wanting to lose all my hard-earned progress. I'm thinking about making a mileage goal for the month of October - just enough to require me to run short distances pretty often so that I get into a more regular routine. I also know that all the running without additional strength training probably resulted in my leg muscles getting unbalanced and causing a couple typical running knee injuries, so I should spend more time building strength through other forms of exercise. (My brother would point out that another way to not get running injuries is to just not run). I'm also just so tired of running and anxious to try other things - so I'm thinking about making a goal to try new exercises and strength training classes, like boot camp or crossfit, or relaxing things like hiking or swimming. In short - I want to continue to get in better shape, but I would like it to hurt less. I want to exercise more often, but with more variety.

3. New Food Plans
I forgot that long runs make me super hungry so that I absolutely must eat everything in sight. Plus, when I was running into work and couldn't carry extra food with me - or just working through the weekend without time to prep food - I fell way off the bandwagon on home cooking, and ended up buying lots of crappy food for breakfast, lunch and so many afternoon snacks. I am really excited to get back in the kitchen. Making breakfast and lunch for myself is both healthier and cheaper than buying food at work, so I'm digging out my old favorite recipes to make in advance. But dinner has gotten interesting lately- not only does food need to be healthy and relatively cheap as always, but now we eat dinner with our son so food needs to be something he will eat (not super spicy or messy, fingerfoods are useful), as well as done before his bedtime - giving me roughly 15 minutes to get in the door before food is on the table. All of these constraints make things more challenging - so I'm kind of excited to figure out new options that will work. I think I'm finally going to tentatively embrace the slow cooker, in addition to lots of weekend prep. I have visions of roasting root vegetables and hearty soups and general scrumptiousness.

4. The Fun To-Do List
Because the weekends were spent either running or working on the house  - we didn't get to do many of the fun summery things I would've liked. Now that we're getting that time back - I am super excited to get out of the house, and start crossing fun things off the list.

  • Go apple picking
  • Go wine tasting
  • Cook something on an outdoor fire
  • Take a day hike
  • Go to the zoo 
  • See Mt. Vernon
  • Celebrate Octoberfest 
  • Halloween. 
5. House Maintenance
Ok, I get that no one else would be excited about this but me - but all the focus on finishing up the halfbath has left the rest of the house a bit disheveled and worse for the wear. There are a bunch of regular projects, like weeding the lawn, that have been completely ignored over the past few months. There are a bunch of new projects that were created by the construction - like piles and piles of displaced cookbooks, serving bowls, and pantry items that no longer have a permanent home or construction tools and debris that are strewn about the house and garage. It's time to make the fall capsule wardrobe and put summer clothes in storage. The whole house just needs some attention. I want to sort through all the stuff to empty out things we don't need for donations and trash, and then give everything that remains a good dusting/scrubbing/reorganizing. 

6. Learn and Teach Something New 

So - it's been years since I was a student, but the return of fall still gets me excited about the return to school. I'm anxious to learn something new - maybe I can finally commit to actually practicing the piano and learning a new piece, or even taking lessons again. I have a million podcasts that are accumulating on my phone. There are a bunch of short term classes I would love to sign up for - a weekend woodworking class, an online photography class, a blog-based baking school  - that would be a fun way to get better at something I like to do but sort of suck at. I also started volunteering back in the spring, teaching a course for GED students, which ended for the summer but is starting up again for the fall. I'm excited to get back into teaching, thinking through the material, figuring out how to present it at the right level and speed, incorporating real world examples, while figuring out how to meet standard testing requirements and other constraints. I like the challenge and am looking forward to getting back to it.

Ok- so re-reading through this post makes me sound sort of crazy/overly ambitious. I know that the end of the half marathon will free up a couple hours on Sundays, but not infinite additional hours. Even so - I am excited to do more of all of these things, and look forward to figuring out how to juggle all the competing interests, as always, in order to squeeze just a bit more into the day.  

Monday, September 19, 2016

Trim for the Halfbath Window

We're rolling right along on the halfbath and mudroom and are ready to finish up the trim. Next up - finishing up the little window in the half bath. Quick background -  the contractors framed in this wall and installed the window, but left it unfinished. After a bit of googling around, I figured out how to trim it out. (This Old House tutorial here.) (Note: preemptive apology for crappy photos - it's really hard to take a pic of a window when it's light outside).

where the contractors left off

Step 1 - Clean it Up
Using a utility knife, I quickly cut out the excess spray-in insulation and sheetrock so that everything is flush, even and smooth.

cleaned up and ready for trim

getting inspected by our littlest family member

Step 2  - Window Jams
So, first up, we cut the jams for the sides and top of the window. Unfortunately, our window is just slightly too deep to use the standard jams, so I used a couple 1x8 boards. First I cut it down to length, and then put it in place, marked the overage, and then rip-cut the board down to the right width. With our brand new table saw, it was super easy to set up the guard thing to the right size, and then just woosh the boards through. I cut the two side boards first, nailed them on, and then cut the top board and nailed it on.

Step 3 - Window Sill
So, the next thing to go in is the window sill and it is by far the most difficult piece. Home Depot sells special molding boards for this (actually called a window stool), which are rounded over on one side and nice looking. Again, our window was slightly too deep for the board, which put me in a weird spot, so I decided to first cut and install this board, and then cut down a smaller filler board to cover the gap. So, first, you have to decide what kind of casing will go around the window, because the sill will be just a bit bigger than the finished and trimmed window. Since this window is right against the wall, we didn't have room for anything bigger than the standard 2 1/4" window trim. So, first, we cut the window sill down lengthwise, it should be the width of the window + 2x the width of the casing + 1" overhang. Next, we need to notch out the walls, which are the depth of the window by the width of the casing + 1/2". (just see my diagram below- this is hard to explain.) Once I had the sill cut, and a second skinny board of the same depth to fill the gap - I just nailed them down.


jams and sill

Step 4 - Casing
Now we add the casing, using 45 degree angles to frame around the top and sides of the window, resting on the window sill.

Step 5 - Apron
Last, the underside of the sill gets fitted out with more of the casing, turned upside down. I used 30 degree angles for the ends. Then, we didn't like how it looked because it seemed like too much molding for such a small window, and more importantly, the sill didn't overhang enough to cover my apron - so I ripped the apron in half, creating a much smaller little board that was small enough to fit under the sill's overhang.

casing and apron

So, I still need to caulk and paint everything - but I'm waiting until I can do all the trim at once - so hopefully that will happen shortly. The rest of the trim is almost done. Plus, I have an update on the personal shape-up plan - so stay tuned.

Monday, September 12, 2016

Finishing the Pocket Door

As I explained in my last post, after the tile floor went down, we should've installed the pocket door next, because all of the trim builds out from the door, and it's easier to install trim before there are fixtures in the way. However, we knew it was going to be really hard to do, so we just put it off and went ahead with the toilet and sink. Once they were installed, we finally had to bite the bullet and focus on the door. As expected, it was a total PITA, so I am really glad this is finally done.

Step 1: Find a Door
The track was installed in the wall by our original contractors a couple years ago, so all it needed was a door. We could've bought a new one, but didn't want it to look too different from our solid wood, super old doors. It turned out that the door to the closet in our bedroom, which we plan to remove eventually, was just about the right size, so we decided to use it. We removed the hinges from the door fairly easily, and then I took it outside to quickly sand it down and give it a coat of walnut stain to try to reduce the red color just a bit.

door to the closet in the master bedroom

Step 2: Find the Hardware
I know when the track was installed, there was also a bag of hardware to hang the door, but it long ago was lost. (We actually think it might be closed up in the wall behind the sheetrock. Fun surprise for a future owner!). Finding replacement hardware wasn't easy, since we had no idea what brand our track was, and they don't seem to be standard, and they really don't show the sizes for things. So after buying a couple options, one set finally fit in the track. We just screwed the hanging things into the door and put the wheels on the track.

Step 3: Hang the Door
This was the part I was dreading the most - but it wasn't all that horrible actually. Once the wheels were in the track and the hangers were screwed onto the top of the door, we had to lift the door up into the wheels. Of course, maneuvering a massively heavy door into the small little holes without being able to see what you are doing is just as fun as it sounds. Thankfully, this was successfully completed in about a half hour without smashing anyone's fingers.

door is hanging! 

Step 4: Fix the Frame
Once the door was hanging, we gave it a gentle push into the frame, hoping it would silently whizz closed - only to have it come to a grinding halt immediately. Turns out that when the contractors installed the sheetrock on this wall, they pushed the frame together - pinching closed the space where the door should go. So, after quickly debating whether or not it was important for the door to be able to open more than halfway - Spouso got to work trying to pull the frame back open from the outside. His answer was to try to find and remove the screws that attached the sheetrock to the frame, and then reattach them while putting a spare board inside the pocket cavity in place of the door, to push back on the frame and prevent it from being pinched closed. There was a bit of colorful language, but eventually it worked and we rehung the door and were able to gently glide it closed. Unfortunately, the door got rather scratched up as we tried to move it into the pinched pocket, so maybe I'll come back and refinish the door in the future.

Step 5: Install the Jambs
Now that the door works, we got started on making it look nicer. First up was building a door jam using a 1x8 board. Once we cut it down to the right height, we needed to rip it down to the correct width, but didn't have the right tools to do that. So we got a new table saw! It easily cut the board down to size. So, then we got a couple more 1x8s to cut the side and top jambs down to size, and then screwed them down.

door jambs getting attached

Step 6: Install the Casing
Lastly, now that the jambs were in - we could finally put up the casing around the top and sides of the door, inside and out. We picked up some fancy molding from a local mill place to try to match the really old stuff of the rest of the house. It's not exactly the same, but close, and should help the space look a little more consistent with the rest of the house. This was pretty quick, we just used 45 degree cuts to turn the corners. We did the back door at the same time, but had to rip the top board down because the molding was actually too tall for the room.

door casing is up on the pocket door

pocket door peaking out

back door has casing now too

Now that the door is finally, thankfully, done, we can finish up the rest of the trim. The end is very close!!

Monday, August 29, 2016

Fixtures for the Halfbath and Mudroom

So, if you've been following along, you know that we just finished putting down the new tile floor in the half bath and mudroom. The next logical thing to do would be to install the pocket door, because all of the trim will build off of it, and it's easier to install trim before fixtures are in the way. However, we are seriously procrastinating on the pocket door because it's going to be a real PITA to install. Since the toilet has been sitting outside on the back patio all summer, we were anxious to get it inside and hooked up - so, we're skipping ahead and installing the fixtures first. We'll come back to do the door and trim and stuff later.

Step 1 - Partial Wall Trim
I know I just said that we were going to skip the trim - but I couldn't allow the sink and toilet to go in before some trim, because it would frankly be impossible to install after the fact. So, we quickly put up some base molding and a few beadboard panels on just the critical walls.

base boards going in 

beadboard panels going up

Step 2 - Install Toilet
Next, Spouso took the lead on installing the toilet. He had to install a new drain thing, and drill it down to the floor. Then we cleaned up the old toilet which had been sitting outside all summer (tip: rubbing alcohol easily removes wax ring gunk). Then we stuck a new wax ring on, and set it down on the flange. He added cut-offs for the water lines, and poof! Toilet is back!

toilet goes back in

Step 3 - Install Sink
Then, we turned our attention to a new pedestal sink. He hooked up the drain pipe, and then put the sink in place, installed the faucet, and then installed cut-offs and water lines. Everything occurred nearly without incident, with only one occasion in which water was literally shooting out of the wall and pouring into the basement apartment below. Turns out - not only had the contractors sheetrocked over the drain pipe to start, but they also mislabeled the cut-off valves for the pipes.

new pedestal is in

view from above - I'm diggin the faucet. 

Proof that the water works*

Step 4 - Radiator
Oh, and the plumber came back and hooked up the new radiator - which means that this space will no longer be icy cold in the winter. This should've been a super easy project since they installed the valves before the tile floor went down - but it turns out they installed the wrong size valves, so they had to rip up my beautiful floor to replace the valves. Then they had to come back a couple times to try to fix a slow leak. Eventually - they finally got it right, and now the radiator should work and more importantly- we're done with contractors! I'm starting to get really excited about fall coming and the radiators going on again.

I suspect this will be a popular spot in the winter. 

So, these two rooms just came a long way on the functional spectrum, but we still have a lot to do to make them look more finished and attractive. (For the record - I continue to believe that the bathroom is not actually functional until there is a door, but I seem to be the only one). We're trying hard to push to the finish - so stay tuned.


* So, just a quick note - the boy is all about bowls, spoons and cups these days and has been carrying this particular bowl around all weekend. Not surprisingly, when Spouso showed him that the sink worked, he immediately stuck the bowl in the water and then threw the water all around the room. He gets more interesting every day.

Saturday, August 20, 2016

Halfbath Gets a Floor

So, as you know - the contractors just finished working in the halfbath and mudroom area - fixing the plumbing, adding electrical and a radiator hookup, and hanging sheetrock. Once they were out - it was our turn to get to work on the floor.

Step 1 - Fill in the Gap
This space used to be the back of the house - so there was a small brick half wall that the contractors removed. When they did, it left a crater-type thing in the floor that needed to be filled in. We picked up a bag of cement, stuck a bit of scrap-wood framing to contain the area, and then poured it in and smoothed it out.

framing and leveling to fill in the gap

Step 2 - Add Backer Board
We had a pretty solid plywood subfloor, but needed something stronger that wouldn't bend or bounce and crack the tiles. So we got some tile backer board, cut it down to size with a utility knife, and screwed it to the plywood.

as always  - 6 hands are better than 2. 

backerboard down!

Step 3 - Paint
So you might've noticed the walls changing colors in the pics above. Knowing that new floor was going down, I wanted to get paint on the walls first, to avoid the risk of splatters and spills on brand new tile. But, we hard a hard time picking a color because there were a lot of constraints: it needed to look good against the floor tile for this space, but I also wanted the same color to go in the kitchen, so it needed to look good with the kitchen now, as well as the kitchen post-renovation, plus it needed to look good against the dining room walls, which abut the kitchen. I ended up with 6 different paint samples and painted the whole room 3 times before we finally ended up with a really neutral color that is barely a color at all. Then, after the mudroom was painted a barely-there color, I decided that the half bath desperately needed to be a strong color, so it went half dark bluish/grey. The bottom half went white, in anticipation of a wainscoting situation, still ahead.

a bluish-grey color looked ok in the mudroom...

but looked horrible in the kitchen against the dining room walls. 

So mudroom gets repainted in a creamy, warm-white color. 

Halfbath goes half dark blue/grey, half white.

Step 4 - Tile! 
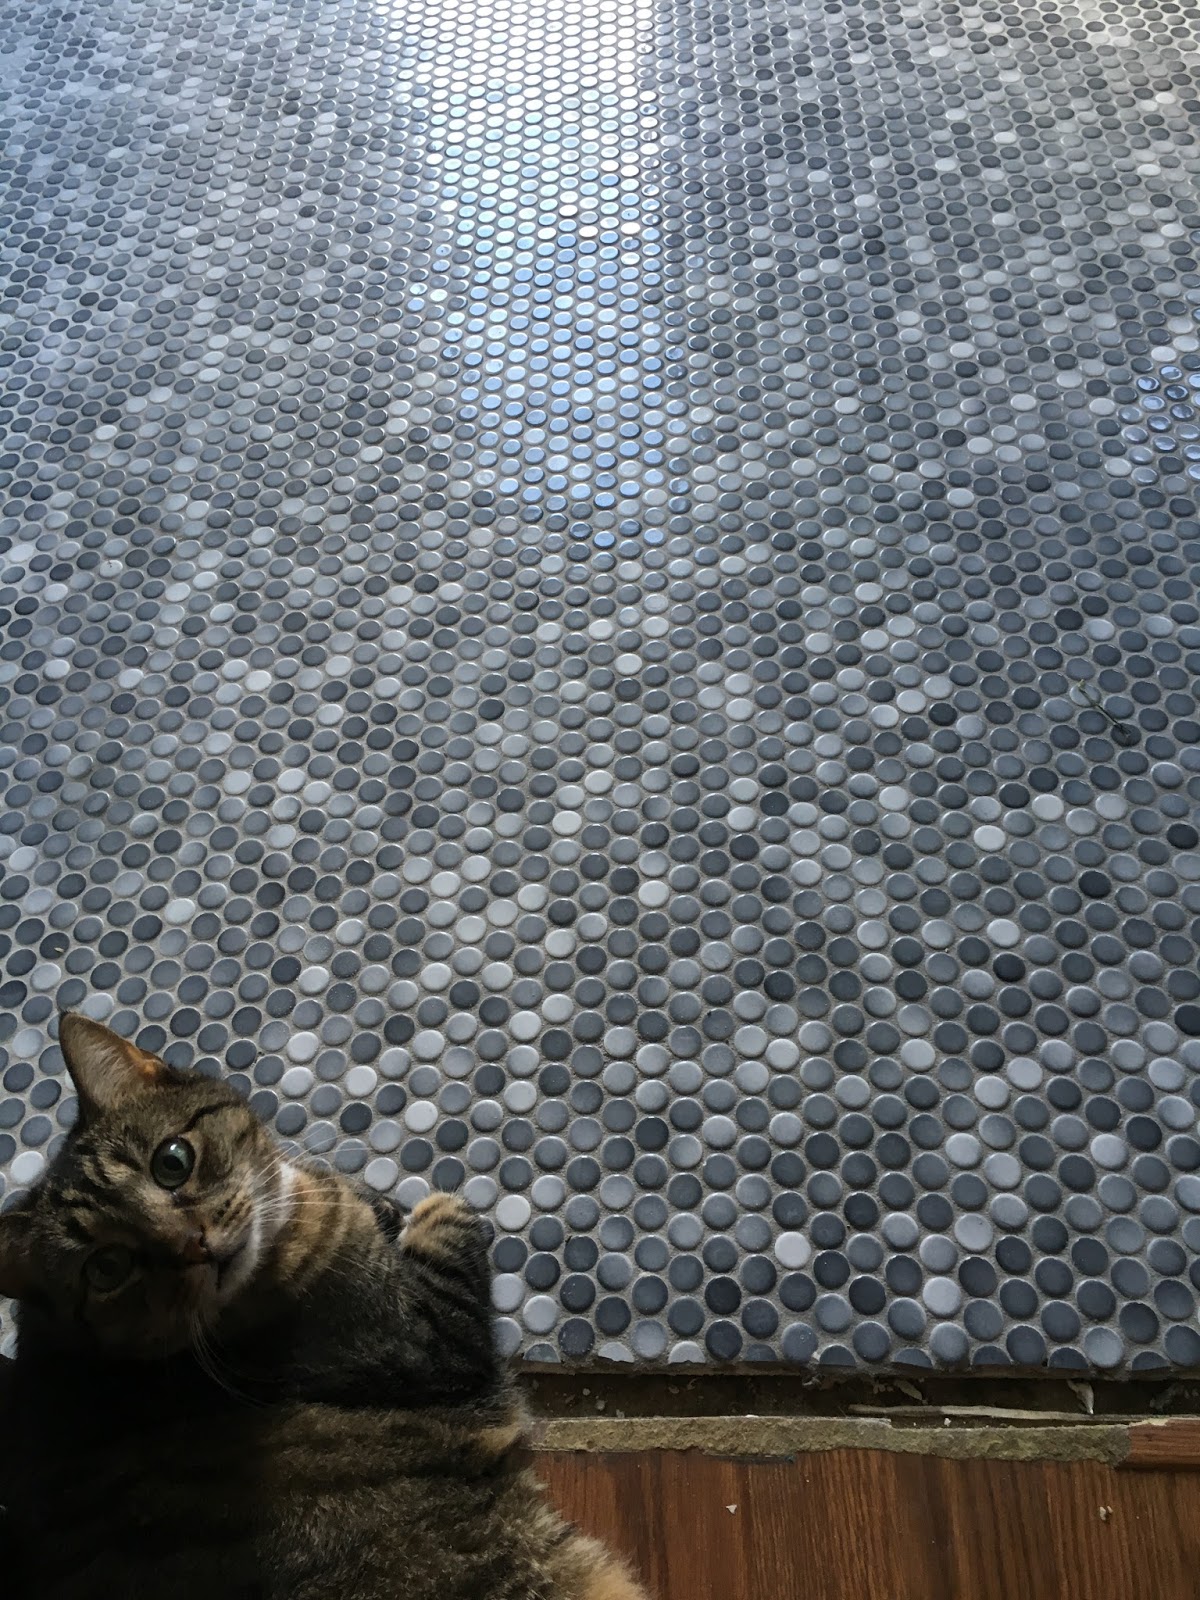
Once it was all ready to go, I finally got to put the tile down. I'm always so excited for this step because it makes such a huge difference in a room. We opted for these little gray penny tiles that came in square-foot pieces. Because the tiles themselves are so small, we didn't even need a tile saw to cut around the toilet and door openings. Instead, I just used scissors to cut the mesh backing, and tile snips to cut a few tiles in half. The whole floor went down in a record 4 or 5 hours.

tile is down!

Step 5 - Grout
So, things were moving along pretty quickly at this point, the tile was down and got 24 hours to dry, so I was ready to grout. We picked a light grey grout color to lighten up the floor a bit while being dark enough to hide dirt (this is a mudroom, afterall). Unfortunately, when we bought it at the tile store - I asked what the square footage coverage of a bag was, and the guy quickly answered "100 square feet". Well, we should've known better and actually read the bag itself. Of course the coverage depends on what kind of tile you are using, and since this is a small mosaic with big gaps between the tiles - one bag had a lot less coverage on this tile than it would on most. So, almost as soon as I got started grouting, it was clear that we didn't have nearly enough. I got the important areas finished, and then had to wait until the weekend to get back out to the store and get another bag. (This wouldn't have been that big of an issue if tile stores weren't located as far outside of cities as they can get).

Syd models the new floor. 

the cats seem to love this room already. 

actually - all the little people seem to love this room already. 

checkout the shine. so shiny. 

Major milestone achieved: Our house no longer has any plywood floors! I'm very excited. We still have a long ways to go to make this a functional bathroom, but we're gaining momentum!

Friday, July 29, 2016

Shape Up-date: Good Habits and New Bags

Ok, so we are about a third of the way through my 15 week shape up, and have arguably gotten through the hardest part. With any new goal or resolution, the first couple of weeks are the time to either make new habits that will stick, or get derailed and go back to the old habits (which is what usually happens). So, while I have been getting moving and getting back on track, I've mostly been focused on identifying the things that will trip me up and finding solutions to make this easier on myself, so that I'm more likely to continue.

1 - Get a Plan
When I set this goal, I was planning on running a very popular, long-ago-sold-out 10 mile race in October, falsely thinking that I could get a bib through work. When a helpful colleague dropped that bomb on me, I scrambled to find a new race around the same time. I know that signing up and paying for a race is a strong incentive to keep me on track, and that I have to strike the perfect balance of long enough that I will be scared into training for it, but not so long that I set myself up to fail. There aren't a lot of races in the fall, so my only options were a 5-miler and a half marathon, which is a bit more than I wanted to do and earlier than the 10 mile race I intended to train for. So - after some noodling, I decided to go for the half and quickly googled a training plan to get moving (I'm doing the Hal Higdon one here). It is only a 12 week training plan, so I only missed the first day.  I printed it off and stuck it prominently on the fridge - a sure sign that I have to stay on track.

Once I had a plan, I added appointments to my work calendar to remind me to go run or to yoga, as specified by the plan. Now that it's a million degrees and humid like a Turkish bathhouse, I'm having to get creative about running outside. I started running to work in the morning, which comes with lots of additional complications, and trying to run on the weekends before the boy wakes up or on my sleep-in day (which sucks when I really just want to sleep in).

On the food front, my plan is to eat roughly 1200 calories per day,  making as much of my food from scratch as possible. In order to stay on track, I started working through my known downfalls:
  • For breakfast, I run out of time in the morning and end up buying gross food at work, so I found some recipes and ideas for things that could be made in advance and then just grabbed quickly in the morning (Here and Here). 
  • I have the same issue for lunch, and usually don't have time to even move food from a large bowl to a smaller container - so I searched for some lunch ideas to prep over the weekend or the night before that I could just grab in the morning (lots of good ideas here). 
  • I know that if I eat lunch at noon, I'll be starving around 3 and make bad decisions, so I've been pushing breakfast back a couple hours so that I can push lunch back a couple hours, and not go ravenous before dinner. 
  • Lastly, I know that when it's my week to cook dinner, I always completely blank on what to make - and usually end up cooking the same 3 pastas over and over or just buying takeout. So we're trying out some meal planning services in hopes that we start eating real meals that meet some nutritional goals (like being vegetarian and eating seafood once a week), instead of our recent norm of scrounging for PB&J after the kid goes to sleep.
  • Very lastly, knowing that we often have too much going on during the weekend to get to the store, I finally downloaded the Instacart app, so I can just feed the grocery list right in for quick grocery delivery.  
2 - Get ALL the Gear
Once I had a plan and got started, I realized I was missing lots of important things. Though I'm generally a minimalist in everything else I do, when it comes to healthy stuff, I want all of the gear - any possible invention to make it just a bit easier on myself and remove an annoyance or inconvenience that will derail my good intentions. Thankfully, over the years, I've now accumulated quite a bit of gym stuff - like a running water bottle, running sunglasses, armband and earbuds, and yoga-mat-sized towel that work (but smell SO horrible). So for all that stuff that I already had, the trick was just getting it all to the right place - remembering to haul it to work for the week and back home for the weekend.

For the stuff that I didn't have, I did some quick shopping. I got a new pair of running shoes from Amazon and raided the cheap gym clothes section at Target to ensure that I had enough stuff to get me through the week without needing to do laundry. Similarly, on the food front, I bought a new lunch box that's big enough to hold all the food I need for the day, nice glass food containers that won't leak, and some reusable ice packs. I just got a nice, new coffee thermos for Christmas, so I'm all set on that front.

3 - Make Backup Plans
As soon as I made a plan and got started, I quickly got derailed. Planning to run over my lunch hour - forgot my shoes. Brought my boring lunch to work - colleague invites me to join her at a tasty restaurant. Planning to run outside - we're having a "heat emergency" caused by something called a heat dome. Thing after thing keeps occurring, totally derailing me and throwing my good intentions out the window. So, even though the goal is still to stay on the plan, I came up with some backup plans for the just in cases. For food - I scouted out some healthy lunch options in case I need to buy food, and picked up some decent frozen things for the days when I'm too lazy to cook dinner that should prevent me from getting much-worse takeout. For exercise - I set up my old yoga dvd for the days I fail to make it to class, and brought a spare pair of clothes and shoes to the office as a backup.  I start each week with my weather app, looking for the days that it'll be cool enough to run into work, and adjust the schedule as needed.  On days that it's too hot to run outside, I can do short stints on the treadmill.

4 - Make New Tote Bags
If it isn't already apparent - one downside to this plan is that I'm now hauling a lot of stuff to and from work every day. Most week days, I'm carrying gym clothes, my lunch, breakfast, and coffee to and from work. Some days, I have all that, plus my gym shoes, water bottle, and yoga towel. The day before running to work, I also bring in all the work clothes I will need. In short - I'm carrying a whole lot of bulky, heavy, and often dirty stuff around.

what I carried to work today:
breakfast & lunch, gym clothes & shoes, work clothes for tomorrow

I have been using some free canvas bags, but they aren't great. They don't have pockets, so everything just falls over and gets mingled and lost at the bottom. They don't have zippers, so things can fall out and be seen by anyone. Plus, they're pretty schlubby and not particularly professional looking. So, of course, I decided to make my own. The goal was to look roughly like this fabulous one on etsy, but to be entirely machine-washable, with lots of pockets to hold stuff, and a zipper to keep things closed.

Step 1. Prep the Fabric
I bought a couple yards of sturdy canvas and drapery fabric, plus a few long zippers and matching thread. Throw all the fabric in the washer and dryer to preshrink, and then iron. Out of the exterior fabric, cut the exterior panels, handles, pockets, and zipper connectors (more on them later).


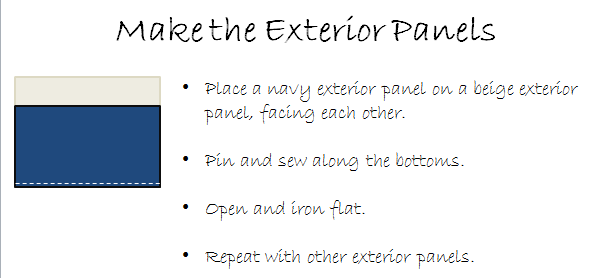
Step 2. Make the Exterior Panels
Because I wanted the exterior of the bag to be made with two different fabrics, the first thing to do is sew the two pieces together to create the exterior panels.


Step 3. Make the Pockets
Next, we make the pockets. To avoid adding too much bulk, I just added one pocket to each side. Also - pockets that are too wide will just fall open, so I cut them in half or in thirds, depending on what I wanted them to hold.


Step 4.  Make and Attach the Handles
Next we make handles, since this is a tote bag. The length of the handles should be about 28-30", so you need to sew down based on the total length of the fabric strip.


Step 5. Make the Zipper Connectors
Through trial and error I discovered that we want an extra piece of fabric to separate the zipper from the exterior fabric, otherwise the weight of the bag pulls the zipper apart. So, next we create what I'm calling "zipper connectors", which are two small pieces of fabric that will connect the zipper to the exterior panels, and look a lot like a hotdog in my picture below.


Step 6. Attach Exterior Panels to the Zipper Connectors
I'm guessing that many (most) tote bags don't have a zipper because it gets complicated at this point. However, if you go slowly and just make sure all of your fabric is facing the right way - this is not hard. This should result in all of the fabric being connected to the zipper. Make sure you leave the zipper half open at the end (or you won't be able to flip the bag at the very end).


Step 7. Sew the Panels Together
So now the panels are attached to the zipper but not each other, so we need to sew the bag together.


Step 8. Sew Box Corners
This is an extra fancy step that you can skip - but it makes the bags look much nicer and sort of stand up on their own. My little drawings aren't great at expressing 3 dimensions - so work with me on this step.

Step 9. Extras
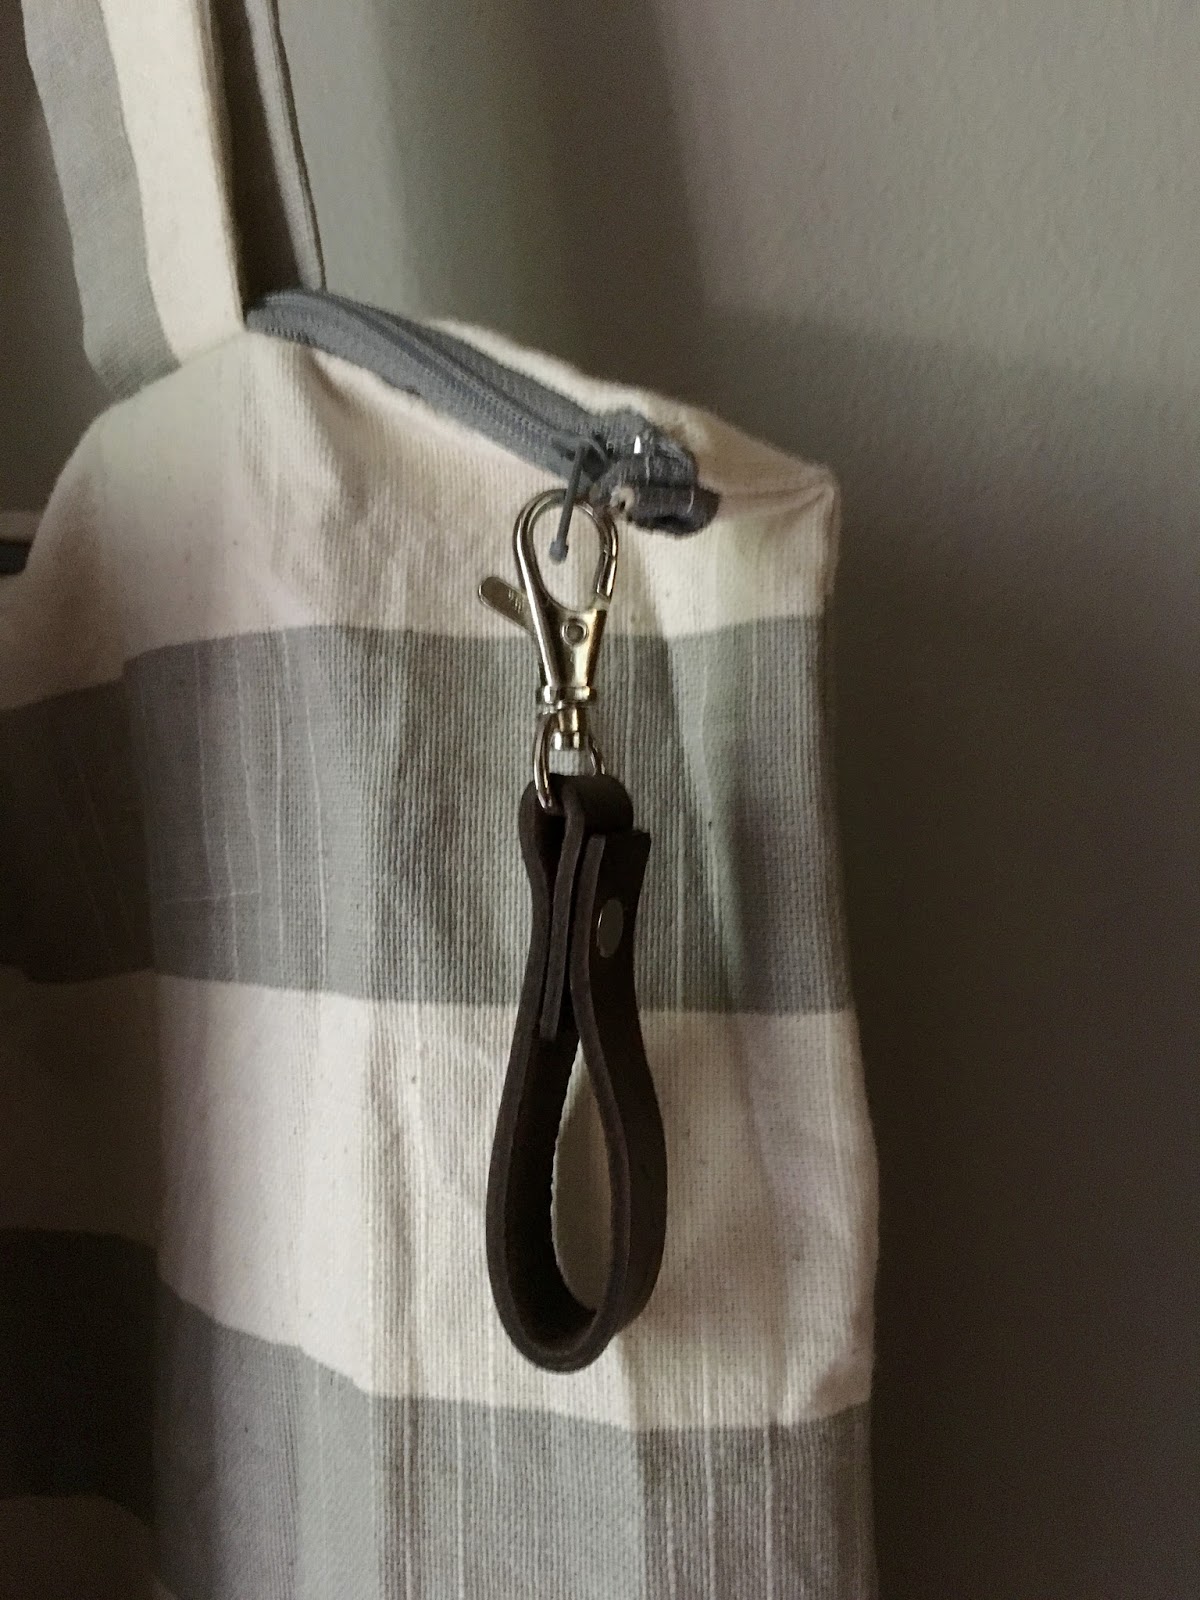
So, as I mentioned before, it was important to me that everything be machine-washable - but I also liked the idea of having some leather accents. So I found a store on Etsy that makes leather straps and keychains, and had them make some leather pulls that could be removed when the bag needed to be washed.

closeup of a leather zipper pull

Then (as if this post weren't already long enough), I decided to make a couple more bags, following the same basic design. I made a couple smaller bags for the days I need to carry less, and then a larger bag for carrying towels to the pool (which we are now doing every week!). I also made a couple really small bags to carry my phone and cards, perfect on days I run to work and don't have my work bag with me or to throw into the diaper bag for the morning commute.

new totes and pool bag

new little bags, just big enough for my wallet and phone

So - I'm not going to say that it's going perfectly. I have definitely missed some runs and fallen off the healthy food wagon - but 5 weeks in, I'm still committed to my goal and working to stay on track. A lot of things are getting easier, I've found that yoga classes don't hurt anymore, and I'm slowly getting a bit faster - but I also have a long way to go. I will keep trucking along, and next up - we'll talk more about progress on the house.