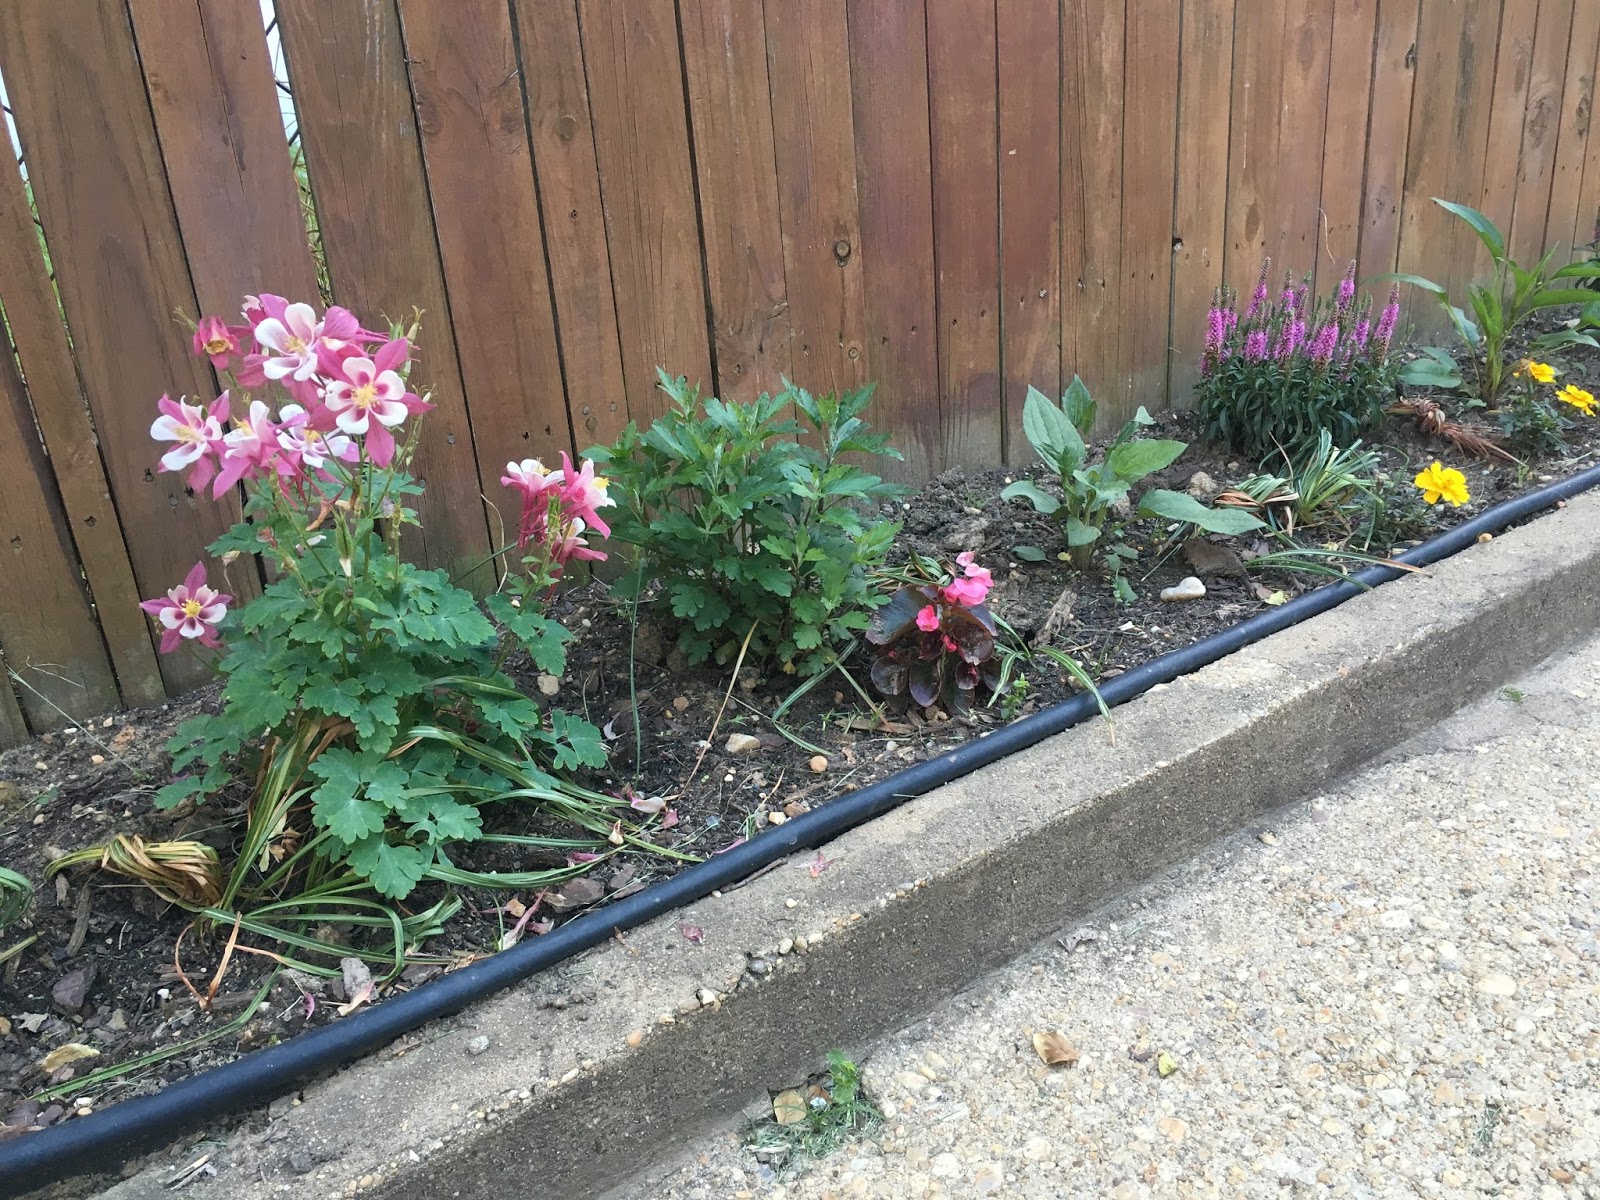
Tuesday, June 28, 2016

The 15 Week Shape Up

So at some point I read that men are more likely to view their houses as the places that they live, whereas women are more likely to view their houses as a part of themselves-  which allows a messy, disorganized house to reduce a woman's self confidence, while it would have little to no impact on a man's confidence. (I can't find the article, but here's another interesting read on the gender gap of self confidence).  For sure, I feel like my house reflects on me, so it messes with my confidence when I know it's a disaster. But then again, my confidence is already kind of messed up right now anyway. There are aspects of both the house and myself that are kind of embarrassing and cringe-worthy, that I've been very slowly trying to fix up or just putting off altogether. For a variety of reasons, the time has come to get both the house and myself back in shape.

house shame 1: the plywood gap-filler between the dining room and kitchen floors

Part A: Me
So, more than a year since having a kid, I'm still carrying pregnancy weight that just won't get lost. I'm tired of not fitting into a bunch of my clothes and feeling not like myself. I have been losing weight steadily over the past 8 or 9 months, but not fast enough - so it's time to get in gear. My goal: in 15 weeks, I will lose 15 pounds. I don't want to turn this into a weight loss blog, but I'm tired of feeling crappy about myself and ready to be back to normal.

Part B: The House
If you've seen our house lately, you would think that we're in the middle of major construction - but really nothing much has happened in quite a while. After the Great Renovation of 2014, we left a bunch of half-finished spaces that we thought we could close up ourselves, but never got around to. Other spaces, like the bathroom and kitchen, have not been touched really since we moved in - more than 3 years ago. The time has come. First, the spaces are just hideously ugly and constantly filthy, which drives me crazy. Second, the kid is basically walking now, and can easily and quickly get to all of the hazardous and dangerous places - which are of course, exactly where he wants to be. He crawls over plywood floors, tries to eat bits of plaster that fall from the ceiling, and picks at the chipping paint and black mold - so, as a well-intentioned parent, I need to do something for his safety. Third, most of these spaces are completely nonfunctional - we have piles of books and office supplies in the office, and piles of trash and donations in the half bath. So, the goal is to finish up all the partially finished spaces (half bath, mudroom, dining room, kitchen, sleeping porch/office) and to redo the main bathroom - or, generally to fix anything that makes me cringe. This is a considerable amount of work to do, but not quite the entire house to-do list - these are just the big projects that have safety/health issues, or major functionality issues. I'll leave the smaller cosmetic things, like refinishing the fireplace hearth, for another time. We've already got a contractor lined up to get started on some of this, but will do most of the work ourselves.
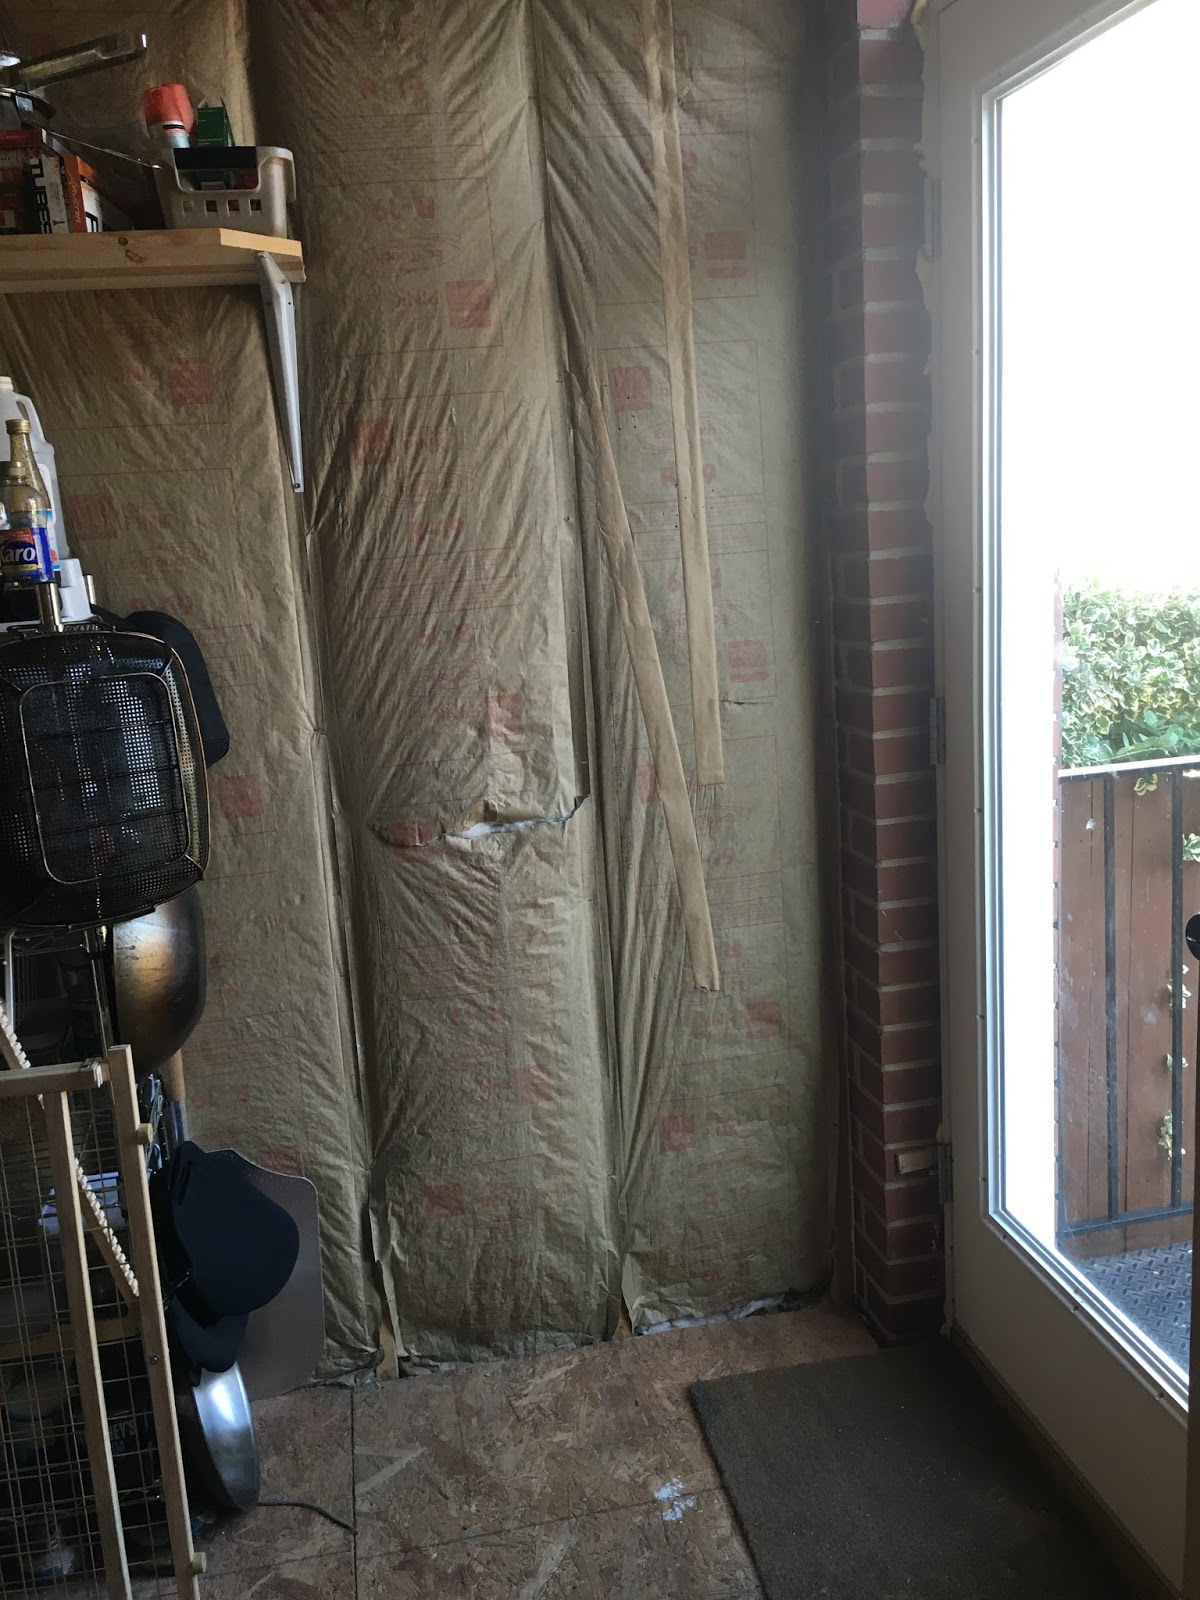
house shame 2: "mudroom"

Here's the list:
  • Finish the back porch
  • Close in open ceilings and floors in kitchen and dining room
  • Fix the eyesores & other hazards in the kitchen
  • Finish Mudroom
  • Finish Half Bath
  • Finish Office
  • Refinish main bathroom
  • Finish the entryway
  • Renovate the kitchen?
For the Boy
So, obviously, this is largely for myself, but it is also hugely related to the kid (as is, basically everything we do now). On the house front, most of the projects on the list are there because they pose health or safety risks to the kid - either rough edges that he could cut himself on or flaking paint and plaster that he could choke or poison himself with.  It's impossible to make a completely hazard-free house, but it would be damn close to irresponsible if we don't fix these things. On the me front, while he isn't quite talking yet, he is already absorbing and repeating just about everything we do in front of him, so we are clearly teaching him all kinds of things right now, including both healthy and unhealthy habits. Just as I wouldn't want him eating junk food and sitting around playing video games all day, I wouldn't want him to feel self conscious about his body when he's older - and that all starts right now. So my goal is to create both healthy lifestyle and habits that he will see and repeat - like exercising and eating lots of produce, and to eliminate unhealthy body shaming and weight loss mentalities.  If we had a girl - I would be even more psycho about this, but even boys get a lot of pressure about body image, so I want to get him off to a good start.

this guy. 

The Plan
So, for me - the plan is the obvious  "exercise more, eat less bad stuff" plan. I'm signing up for a 10 mile race in October to keep me on track - so I have plenty of time to build my base before starting a 10 week training plan. I'll plan to mostly use my lunch hour at work for running and a couple yoga classes for weight training/flexibility to reduce my likelihood of injuring my bad knee. I'll have to do long runs on the weekend, so scheduling that around the boy will be a little tricky. For food,  I'm going to make an effort to bring in my lunch and snacks so that I don't have to buy food at work, and will cut back on useless calories at home.

house shame 3: the current office/sleeping porch

For the house - we have already hired a contractor to get started on some of the stuff we can't do ourselves. For the rest of the stuff, the plan will be to work  mostly during weekend nap times, with some minor work during weeknights after the boy goes to bed. We might also have to take a day off here and there. Balance will be key - since we also want to do fun summer stuff and don't want to waste the whole summer working on miserable projects.

So, a very ambitious, but hopefully doable plan to get everything back in shape by the fall. I'll report back with updates as we proceed. Wish me luck!

Friday, June 17, 2016

A Birthday Book

So - as you know - our kiddo just had his first birthday - which is very hard to believe. It seems like both much longer and much shorter since he arrived. For this momentous occasion, I wanted to get him a great gift that he would really enjoy for a while (like, at least a month), and of course, it needed to be handmade. Right now - he really likes books, particularly with different textures, and especially ones that rhyme. He's also really into zippers and pushing buttons. So, I decided to make a book with all those things.

1. Research & Shop
So - I googled and pinterested around for a bit, and discovered that I was stumbling on to something that already existed called a "quiet book" - presumably meant to be a quiet distraction for places like church. I went to Amazon and ordered a book on how to make felt animals, some felt, stuffing, sequins and beads. I already had embroidery thread and needles. Then (after letting this project grow a bit more complicated), I went to Joanne fabric and ordered some fabric quarters in various colors and more thread. The fabric quarters are selected to look similar to what you ordered, so what arrived wasn't exactly what I wanted, but was pretty close and awfully cheap.

the dining table looked like this for the last two months. 

2. Make Felt Animals
Once I had all the materials, I used the book to make some felt animals. The gist is pretty simple - you just cut out two copies of the outline of an animal, maybe add an extra appendage like a tail or ear or something, add some beads or other decoration, and then sew them together with a bit of stuffing to give it some dimension. It took me about 2 hours to make each animal, a little more for the ones with a lot of decorations, which made it perfect to do at night after he went to sleep. I made 2 or 3 animals for each habitat (forest, sea, etc), and then starting making my own designs for some alien monsters. I also thought it would be fun to get the grandmothers involved, so I mailed both of them the materials and patterns for an animal to contribute.

an owl

giraffe

3. Make the backgrounds
Once I had all the animal critters,  I needed backgrounds for them. Using more felt and the random fabric pieces, I cut out skies, hills, waves, horizons, and whatnot to create backgrounds for each page. I added some trees and bushes, seagrasses, and a farmhouse for more dimension and interest. These didn't get stuffed, so they were much faster to make. I think I pulled them all together in one or two nights.

a background for the giraffe

4. Add something extra to each page
So - at this point I had the makings of a pretty decent book, but it wasn't anything spectacular. I wanted to add something unexpected to every page for more texture and interest. I started with small things like buttons and shoelaces, and then went another step and decided to add some lights that he could switch on and off - a string of fairy lights to be stars on the space page and a push-button light (undercabinet light) to be the sun on another page. I tried to make a rocket ship that would light up and make noise when he pressed buttons - but once I started looking into making my own circuit boards with LED lights, I figured I had gone too far and scrapped the idea.

fairy lights taped to cardboard for the starry night sky

5. Add the Text
Spouso's contribution was the story line - so I just gave him the list of animals and he got to write the story, in rhyming couplets, of course. He decided at this point that the story would be about the animals coming to the kiddo's birthday party and forgetting how to get home, and that he would have to put the animals back on the pages where they belonged. A super cute idea - but it meant a little scrambling on my part to get velcro and add some extra pages to the front and back. Once he was ready, he used a sharpie to write the text on some blank white pages made of leftover curtain liner. I then made additional pages, using the same background as the main pages, and sewed his white text on. In a few cases, we had extra animals that couldn't fit on the main page that needed to be squeezed onto the text page.

a white text sheet and its background page getting sewn together

6. Put it all together
Lastly, I finally got to put everything together. Half of the critters got sewn onto the background pages, and the other half were stuck onto velcro, which was also stuck onto the pages (so that he can move them around). The critter pages were sewn to the text pages, with cardboard in between for support.

one page gets sewn to the next with cardboard in-between

The last step was trying to bind it all together, which turned out to be harder than I expected because the pages were so thick. I ended up just sewing them together on big fabric loops and sticking it in a 3" small binder for protection. Then, almost 3 weeks after his birthday and nearly 2 months after I started - the book was finally finished and ready to be read.


the party page with the 5 lost friends.

the farm page with a shoelace sun

the forest page with a button trail

the savannah page with a light-up sun
(lion by Nana)

the sea page with a zipper sea grass
(fish by Grandma)

the space page with LED stars (that are possibly too subtle to see)

Finale page with cats. 

button trail is the favorite so far


So - this project ended up being pretty massive. It took about two months total - but in the beginning I only worked on it every other night for 2 or 3 hours, and by the end I was working on it every night for many hours.  Clearly - you could make this a little easier on yourself by skipping some of the backgrounds or making fewer critters, but I got carried away. Regardless - I think it turned out pretty well, and he seems to be a fan.

Thursday, June 2, 2016

Powerwashing, Painting, and Plants on the Porch

Ok, so we had the new dining room door installed a couple months ago, which suddenly gave us easy access to this charming little porch that we had been completely cut off from for the past 2 years. So now, of course, we want to be out there all the time, so we needed to fix it up.

the newish door to the small porch (from January)

The small patio and its newish door

peeling paint on the porch floor

1. Pressure Washing
The porch floor was painted years ago (badly), and the paint was really flaking off, which is annoying for a place that I want to be barefoot, but really not ideal for a crawling baby who puts everything in his mouth. So we rented a pressure washer to remove the flakes. Having never rented one before, I had the impression that this thing would instantly and magically power all of the paint off - which turned out not to be true. Instead, it could remove the biggest flakes, then I followed up with my paint scraper tool, and then sprayed it down again. After an hour or so, I had removed all the loose stuff, but there was quite a bit of paint left behind.

after pressure washing - no loose paint but still ugly. 

2. Paint
Since the pressure washer didn't remove all the paint, what was left behind was safe but ugly. So I grabbed a gallon of cement/garage paint, which is presumably meant to be outside and therefore hopefully won't flake off like the old stuff. First, I did one thin layer with a paint brush, and came back an hour later with a thick roller. It made the floor all one nice homogeneous color, though clearly where the old paint was left behind it looks bumpy. I'm hoping this is "texture" that will reduce slipperiness.

after the first coat of paint - all one color but not very smooth

3. Plant Ladder
Clearly, the next step was to add some plants to this area. I wanted some height and wanted to cover up the awkward little notched area where the old walkway used to be - so decided to build a plant ladder using scrap wood. I just took two 2x4s, cut a 15 degree angle in the bottom and a 15 degree angle off of the top so that they would lean against the house, and then cut a bunch of scrap boards that were all 1" thick but various widths to 15" long to be the shelves. I stained them all and added a couple coats of polyurethane to protect them against the water. Then I screwed them to the 2x4s, 1 foot apart. I bought a bunch of terracotta pots of various sizes and some shadey, drapey plants. In hindsight - I should have spaced them out a bit more than a foot (or gotten shorter pots), because tall plants bump into the step above - but it's no biggie.

plant ladder!

So, the painted floor and lack of peeling paint chips are a huge improvement, and I'm pretty proud of my plant ladder and its flowing greenness. As is to be expected, now that one major eyesore has been fixed- suddenly a new one pops out. It is now super apparent that the handrails are flaking and desperately need to be painted. Also, even though we like our neighbors, a little privacy curtain would be nice to separate our space from their back door. Plus, it would be great to upgrade the furniture - so maybe some of these things will happen next. For now, this is already much nicer and safer than it was before, and has already gotten a lot of use.

yay porch. 

Tuesday, May 31, 2016

A Circle-Themed First Birthday

If you've been watching for a while, then you'll not be surprised that our kiddo was ready to celebrate his 1st birthday.  We knew we wanted to throw a party, and of course knew we wanted it to be super cute - but weren't sure what to go with. I googled and pinterested first birthday ideas - which was  completely overwhelming. People go absolutely crazy with 1st birthday parties, (or maybe just kids' parties in general) with the smash cakes, professional photos, and themed food and games - holy crap. So after a bit of party-theme soul searching, we decided to pick a pretty easy theme of circles, and a general color scheme of blues and greens. We invited just our family and closest friends for what was meant to be a very small afternoon party.

streamers down the staircase

more of the streamers

family pretending not to be too hot

Balloons:
While the boy took his morning nap and we waited for guests to arrive, we started by filling the house with balloons and streamers. When he finally came downstairs, he got to chase the balloons around and hug them - while some of the older boys had fun bouncing and kicking them around the house.

happy birthday boy and balloons

Balls:
Outside, where the party was mostly contained - we bought a cheapie inflatable pool and filled it with balls. It wasn't super full - but full enough to get the idea. With an umbrella for shade- all the kids gravitated towards it, and despite a wide age range of 10 months - 7 years, they all seemed to have fun.  As a party favor, I grabbed a bunch of spikey balls that light up when bounced, and some suction-cup balls that stick to glass. Everyone, including the parents, seemed happy to throw them around.
ball pit mid-jump

enjoying the ball pit with a cousin

watching the ball pit with Nana

thinking about getting in the ball pit

chilling in the shade in the ball pit

Bubbles:
As another party favor/game, I just bought some cheapie tubes of bubbles. I don't think anyone but me actually played with them, but hey (therefore, no pictures).

Rings:
For the cake, I went with a stunning stacking toy design - making 4 layers out of different sized circles, frosting them each a different color, and then stacking them on top of each other. The bottom cake was a 9" standard cake pan, and the top cake was a cupcake - so for the two middle layers I used an 8" cake pan and cut them down to size, using plates as a template. I saw a trick to bake the cake at 325 instead of 350 degrees, to reduce domeing, but it didn't work perfectly, so, the cake sort of tilted to the side a bit.

stacking rings cake

shoveling down the top ring of the cake

Food:
The rest of the food was spouso's responsibility - and he did really a great job.  We both like to cook and want to serve our guests our best food, but have learned that you really don't want to be cooking during the party or you miss out. So he struck a good balance of making some things in advance (like a cold veggie pasta salad and fruit salad), while ordering/buying other things (like pizza and chips). I guess pizza is circle-shaped, but I didn't worry about the theme here - bigger concern was trying to find some healthy options that would be baby friendly that adults would also eat.

Entertainment:
The ball pit, balloons, and bubbles helped keep the kids mostly entertained, but then it got hot and everyone came inside. After a bit of time indoors, we were all getting a little ancy and needed to burn off some energy - so we walked over to a nearby playground to run around. It was a nice break from the house for all of us.

oh sweet playground

spinning or just relaxing, depending on your pov.

Presents:
Even though we told them not to, guests still brought a bunch of toys. So, after the party was over, we ended the weekend by rearranging the furniture again (we seem to rearrange the living room every other month or so), to create a new toy storage system in the living room (which is bolted to the wall). At this rate, we will really need to come up with a toy rotation system or something - but all the new stuff is so much fun now that I wouldn't dream of hiding anything away. We did finally pack up the bouncer, which was his Christmas gift, took up too much space, and has already been outgrown.

new toy storage in the living room


Concluding thoughts on kids' birthdays:
  • I tried to keep it low key - but it was still fairly chaotic. He did ok, but was clearly overwhelmed at times and not really having fun. We were mostly able to enjoy the party and not too busy hosting, but would've been much happier to not have spent the two hours before the party started frantically running around to prepare. Clearly getting all the shopping and much of the cooking done the day before would have been better for us, and giving him some quiet breaks away from the noise would have been smart.  
  • It would probably be a good idea to keep the guest list a little smaller in the future.  1 kid per age of the birthday boy seems like a good rule that we totally broke (we ended up with 8 kids and 14 adults, yipes!). Too many people in a small space just really amps up everything. 
  • Themes seem completely unnecessary - just good food and some decorations are all you need. Maybe older kids would care more - but babies have no idea, so themes are only good for adding extra stress for the hosts. 
  • Games would probably be really difficult to arrange, but it was helpful to have toys/activities that the kids could do on their own to stay entertained. 
  • It was handy to be in our house/yard, but having a playground to escape to was key, both because it gave us all a chance to run around and burn off some energy and because it provided a change of scenery to shake things up. If we had been stuck indoors the whole time I would've snapped. 
  • While being outdoors is great - the weather makes it complicated. Even though we had a beautiful day, it was super hot, so being outside the whole time as planned didn't work. Thankfully, we could come inside to kind-of cool off, but I wish I had thought to get some water toys or something.  
  • Favors were a total waste - no one realized that that's what they were, so we just ended up with everything leftover. Now we have like 10 tiny bottles of bubbles and a million little balls. 
Anyway - our little guy is 1 now - which is huge. He's got a bunch of words and is really close to walking on his own - and getting much more fun every day. Meanwhile, we are all sleeping through the night and slowly getting more and more under control and out of new-parent panic mode. It's hard to imagine what we were doing this time a year ago - coming home from the hospital and barely able to eat without help from our family and friends. Thanks again to everyone who helped us make it through the year - I promise I'll be less surly next year. More on our birthday gift to him next. 

Tuesday, May 17, 2016

Spring Yard Update

As usual this year, I've spent the last couple weekends out in the yard, clearing away the trash from the winter, planting the new stuff, and weeding like crazy. After a lot of rain - everything is doing great, and the yard is now ready for its annual spring post.

my little redbud tree getting bigger each year

1. Shrubs
So, when I first landscaped the yard 3 years ago, I set out to fill the yard with flowering shrubs that would bloom at different times of the year so that we would always have something in bloom, but not have to replant them every year.  This year all of the shrubs stayed alive through the winter - some even bloomed for the first time.

abelias have gotten huge

azaleas are finally blooming

mountain laurel being over the top

rhododendrons finally blooming and putting out new leaves

2. Perennials
As a Christmas gift two years ago, I received a gift certificate to Burpee (thanks again Bill!), a huge online plant store, which I used last fall to buy some perennials. I was not expecting much out of them, as the foliage pretty much died off as soon as I put them in the ground, but low and behold, they are all coming up and doing well so far. I don't exactly remember what they are - so it should be a fun surprise when they finally bloom, later this summer. At the same time, the few cheapie perennials that I bought on sale in the middle of the summer came back and are blooming already too. I was sure they were toast - but they're already doing great. I'm hoping for some awesomeness from these sections of the yard this summer.

yellow flowers were planted late last summer but doing great so far

mystery plants coming up between the pink ones

3. Annuals
So, my goal is to have almost no annuals, since they are the expensive part that you have to pay for every year- but I still bought a bunch. So far, they are all doing great and growing quickly. The kitchen garden is set up, but significantly smaller this year, in an attempt to keep a little control over what is usually pretty chaotic.
kitchen garden is tame for now

4. Solar Lights
In non-plant news, several years ago, we bought the cheapie solar lights to line the walkway. They quickly fogged over and stopped working. Last year, I tried to scrub the fog away, which worked briefly, until it didn't. So, this year I bought some new slightly nicer ones. Now we have a full set of working lights, which will hopefully last a couple more years.

new cheap solar lights will hopefully last a couple years

5. The Cement Patch
When the old brick stairs were removed, they left behind a patch of rubble under the new stairs. We had an old bag of cement just sitting in the garage, waiting to go bad, so I finally just grabbed a bucket, the hose, and a trowel, mixed it up and dumped it in. It's not perfect and could use another bag - but that seems pretty unlikely, so I'm calling this done for now.

patch of loose rubble under the stairs before...

no longer loose rubble after. 

So, that's the spring yard update. Other than some regular weeding and mowing, I'm pretty much going to let it do its thing, while we turn our efforts over to the little porch which needs some loving.