Tuesday, May 30, 2017

The 2nd Birthday: A Kitchen and a Construction-Themed Party

So we are super excited to get started on the big renovation projects, more on that soon. Meanwhile,  our kid just turned 2. Not only was that surprising and shocking in many ways, but it meant that it was time for another birthday party and an over-the-top birthday present. Last year really set the bar when I made a book that took a month to complete. (He still really likes it, btw). So this year, the plan was to give him a play kitchen, since he loves to pretend to cook, but to fix it up super spiffy, as a small scale replica of our future kitchen. One weekend a couple weeks ago, we swung by Ikea and picked up their Duktig, and then I got to work.

the Ikea Duktig

Step 1 - Countertops
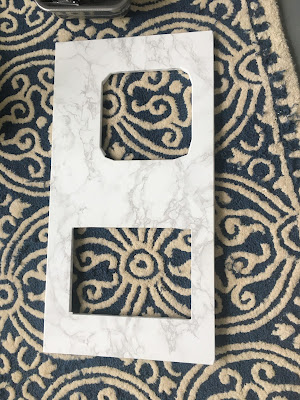
The first thing I did was to cover the countertop in faux-marble contact paper. I didn't do a great job though, and left a bunch of bubbles, so I eventually stripped it off and did it again more carefully, using a credit card to smooth as I went.

the original piece was unfinished wood 

covered in contact paper - looking nice

Step 2 - Appliances
The basic model has white doors for the microwave and oven, which is just not good enough. I taped over the "glass" part with painter's tape, and then just spray painted them with silver spray paint to make them stainless steel.

microwave and oven doors ready to go

getting painted in the back yard

Step 3 - Painted Cabinets
The basic model also has blond wood for all the rest of the cabinets, which is definitely not our color scheme. So we picked up two quart size paint cans, one dark blue and one white, to paint the bottom and top cabinets respectively, to create a two-tone tuxedo cabinet look.

the blue bottom cabinet, coming together

holding down a blue door
Step 4 - Handles
The box comes with plastic handles that felt sort of clumsy and chinsey - so we grabbed three new handles (5" set) to upgrade the others. Unfortunately, none of the screw options fit, so we ended up having to run out again to get the right size of screws to attach them to the doors (#8, 3/4 inch FYI).

nice new handles on the doors
(if you look close - you can see a nice cat print on the blue door)

Step 5 - Oven Knobs
One more easy add was to attach a couple knobs to the front as oven knobs, though I'm a little concerned that this will encourage him to play with the real oven knobs.

three oven knobs going on

Step 6 - Hinges
One thing I wasn't thrilled about was the way the two bottom cabinet doors opened. Both were predrilled to have handles across the top (good for the oven, weird for the cabinet), and to open out sideways (good for the cabinet, weird for the oven). So, we turned the cabinet door 90 degrees so the handle would be vertical (the door is a perfect square, so it still fit on the spot perfectly), and then redrilled the holes for the Ikea hinges. We wanted to add a hinge to the oven door so it would open down, but realized in drilling the other door that Ikea furniture isn't super resilient - it's just pressed sawdust - so we were worried about drilling more and scrapped the idea.

Step 7 - Accessories
I had plans for something grander involving a pot of herbs, but instead ran out of time and just settled with placing some play food and cans in with pots and pans and a bunch of bows.

all ready to go

Gift Time
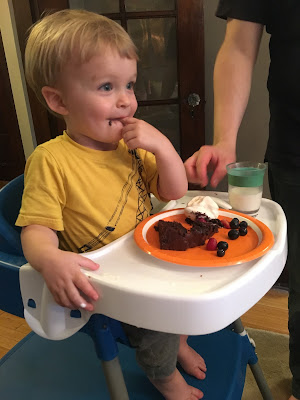
So after slowly poking at this project every night for a couple weeks, it was finally ready to go. We snuck it down into place the night before his birthday. Once he woke up, we tried to play it super cool, and casually brought him into the living room, waiting for him to discover it. Once he did - he was very excited, and spent at least an hour opening all the doors and looking at all the food and pots and pans - it was a huge hit.


The Party
So, later that day, we got ready for a small party. The goal was to be a little lower key than last year, with just family and all food that would be made in advance, so no one would be in the kitchen during the party. We made a BBQ pork shoulder because it could be mostly done in the slowcooker the night before. I made a bunch of cold salads (a pasta, a cole slaw, a spinach salad), because they could all be made during the nap and eaten room temperature. I still ended up in the kitchen a bit, making an unnecessarily complex pitcher cocktail and arranging things on serving dishes, but mostly it was a success.

dinner coming out - mostly cold salads and BBQ sandwiches

enjoying the meal with family at an adults table

the little porch serves as an excellent kids table

For decorations, we went with a construction theme, out of his love for construction cones and diggers. During naptime, I put up some yellow and orange streamers and balloons, which always make a huge impression for not much money. I also picked up some cheap cones and rings to place ring toss, meant to be a cheap decoration, but he's pretty excited about the cones staying as a permanent toy now.

balloons and streamers coming down from the skylight

more streamers and balloons around the house

enjoying the balloons and decorative cones

My pride and joy (you know, other than the kid) was the cake. I went a little pinteresty on it. It's a two layer (top layer is smaller than the bottom layer) chocolate cake, with a ramp going from the bottom layer to the top. I added a few small construction vehicles driving up the ramp, and lifting crushed oreos into a dump truck. It's small and dark, so it's not super obvious what's going on, but he was pretty excited about it.

my cake

a closeup of the bulldozer on the ramp

cake passing the important test

 All in all, it was a pretty big success. He is very excited about the kitchen and the party, especially all the orange cones. So, inevitably, the two got combined when he decided to wash all the cones in the sink.

Thursday, May 18, 2017

Introducing the Master Suite Project

So, as I last posted, we are finally moving forward with both the kitchen and master suite projects. Because we installed skylights based on our planned changes to the floorplan, they are in awkward spots in the current floorplan, forcing us to complete the project. Adding plumbing and electrical for this new upstairs bathroom will involve knocking some holes in the kitchen below, so we are doing both projects at the same time. Here's the story on the master suite part of the project:

Work Done So Far:
First, a look at how this space got to where it is now.
  • When we first moved in, there was a big closet in the spare room next to our bedroom, and the sleeping porch was a disgusting mess because it was surrounded with the crankable windows made of lots of small panes of glass.
original sleeping porch
  • In the big renovation of 2014, they closed in the sleeping porch with real windows and siding. They also installed the washer/dryer in the closet of the spare room, moving the closet door so that it could be accessed from the hall. 
closet getting prepped for new W/D

 sleeping porch gets closed in
  • Last spring, I got frustrated with the crappy master closet and hung some shelves and a closet rod in the spare room, where the walk-in closet should be. 
I take over the spare room
  • Last fall, we put up sheetrock in the sleeping porch, but stopped short of actually finishing it. 
sheetrock going up

this is as far as we got
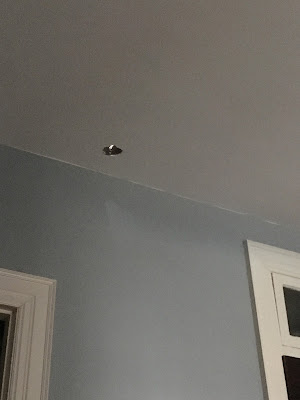
  • Then, just a couple weeks ago, we had new skylights installed based on the final layout, which are in awkward spots in the current layout. We can't actually see them because the ceiling is still in the way.  
see look - there's a skylight up there! 

Layout
The reason we want to create a master suite is partially because the current layout is awkward and wasted. The spare room is too small to be a real bedroom, and no longer has a closet. The sleeping porch is also long, narrow, and useless. Speaking of long, narrow, and useless, the current master closet is a total waste of space because you can't see what's in it. Also, we only have one full bath in the house that we share with guests and the kiddo - so we thought having a second one would really add value to the house.

The new layout creates a new walk-in closet and demolishes the old, current one to make the master bedroom bigger. In the remaining part of the spare room, we add a double vanity and the toilet. Then we open up the current window into a door, and put a shower and bath tub out on the sleeping porch. The other half of the sleeping porch becomes an office.


Design
The current style of this space is pretty lacking. I have tried to fix up the bedroom before, but it always looks pretty lame, mostly due to the lack of natural light, which should be fixed by the new skylights. The sleeping porch/office obviously, is still not finished, so there is no style speak of at all. I would like one cohesive space that feels calm and pulled together. And the spare room is basically just a big mess, with my closet exposed and piles of other stuff that seem to accumulate.

I have previously posted my design plans for the bedroom and the new office - but now I'm trying to shift to thinking about this as one cohesive space, instead of a couple awkward rooms. So the general plan is similar to the kitchen, with greys and blues, white marble in the bathroom, lots of walnut wood accents.

  1. This is our current grey-blue wall color
  2. New curtains for the windows
  3. A small desk with storage
  4. A comfy reading chair that ideally folds out into a twin bed
  5. Pretty pillow
  6. A real headboard
  7. Our current blue/grey quilt
  8. New fancy sheets with bluish trim
  9. I love this dresser for either the bedroom or bath vanity
  10. Bronze fixtures and faucets 
  11. Freestanding bathroom storage
  12. Marble hex tile for the floor and big tiles for the shower walls
  13. Blue towels!
The Work Plan
As I mentioned before, the plan is not to use a general contractor, but to hire the subs directly and do some of the work ourselves to reduce cost. We will hire out the demo, framing, plumbing, electrical, and sheetrock - then we'll take over and do the paint, installing fixtures and finishes.

Having both projects going at the same time is going to save us money and time, but it will make it even more miserable to live with. Thankfully, we can simply move over to the guest bedroom and use the current bathroom and generally stay clear of this area while the work happens. 

Wednesday, May 17, 2017

Introducing the Kitchen Project

As a couple of people who both really like to cook and entertain, our kitchen has been a disappointment from the moment we moved in. We made a number of significant changes to the room already, but weren't able to do a full renovation. Now that the skylights are installed upstairs, we have to do the master suite project, which will involve tearing up the kitchen for plumbing and electrical, so we're going to do the kitchen at the same time. We're about to start another major renovation.

Work Done So Far
First - a quick look back on what's already happened and how we got to where we are:
  • So, when we first moved in, the kitchen was a small room with cabinets all on one side, a huge pantry, and a wall separating it from the dining room. It was immediately clear that there was not enough counterspace or cabinet space, and only one drawer. We put a small table against the wall to help, but it was clear the room needed a lot more work.
yikes. I forgot how yellow the trim used to be.

view towards the dining room- pantry on the left.
  • During the Great Renovation of 2014, our contractors took out the wall between the kitchen and the dining room, which was great because it opened up the rooms and made them both feel bigger, but not great because now you had to look at the kitchen while you sat in the dining room. They removed the massive walk-in pantry to make the space into a halfbath, which left all of our things with nowhere to go. We brought in two massive shelves for temporary storage, which were really unattractive.
wall comes down

view from the dining room - pantry shelves on the right
  • Then, in 2015 before starting the nannyshare and worrying about the shelves crushing our newborn - (actually, I was much more worried about the other kid getting injured) - we got rid of the wire rack and brought in two huge cheapo cabinets to hold all the small appliances and add extra counterspace. The other wire rack acting as our pantry was moved out onto the unfinished mudroom space.
new cheapo cabinets for storage and lots of counterspace

pantry lives out on in the mudroom
  • Then, last summer we finally finished the mudroom, which meant the pantry had to move again, so we bought two more cabinets to go on the back of the island for the pantry. We also finally closed up the open holes that the contractors had left 2 years earlier and hung some shelves. So this is where we are now.
new shallow cabinets on the island become our pantry

view from the dining room

Problems with the Current Kitchen
There are a bunch of problems with this room that prevent it from being anywhere close to my dream kitchen. Let's start with the layout.

 
the current layout - crowded and lopsided

  • The cabinets and outlets are all squeezed in the corner, right between the stove and fridge - so as soon as anyone wants a cup of coffee, a plate, or to use the microwave, they are in the way of anyone else trying to use the fridge or stove. Generally, I want to stretch out and spread out the main work areas, so that it's possible to have two people in there at the same time.  I want to create a small wall for the coffee maker, microwave, and glasses and dishes - so that it's possible to pop into the kitchen for those basic things, without getting in the way of the main work areas.  
  • The counter space is not near the appliances or sink, so we are constantly carrying things back and forth from the fridge, to the counter, to the stove- making it even harder to have multiple people in there at the same time. More counterspace on either side of the stove and sink would really help, as would having things stored in the cabinet where they will actually be used (like knives and cutting boards by the sink). 
crowded corner is our big problem area

As for appearance: 
  • The upper cabinets don't go all the way across the room, so it always looks lopsided to me. I want some balance. 
  • I really hate the granite and the orangey-wood cabinets that our predecessor put in - they are super dated and make the room darker. The cheapo white cabinets that we bought of course look cheap, and clash against the older ones. 
  • The floor is a plasticky laminate that is super slippery when wet (which is why we have that hideous rug on the floor). It was also installed over the previous floor, so the whole kitchen is about an inch higher than the rest of the first floor, which makes everyone trip.
  • The walls are a painted, textured wallpaper, which is constantly filthy. The walls are also like three different levels, which makes the cabinets bump in and out. 
  • There aren't enough lighting options - so it's either way too bright or too dark. I would like some pendants, more recessed lights, and under cabinet options too.
trying to take a pic of the floor height issue - can't take a camera out without the boy running over (total ham).

New Layout
The new plan moves the sink and dishwasher to the island, which be the primary prep area, with items like cutting boards and knives. The stove moves down the wall, with cabinets and counterspace on either side, creating a second prep area between it and the fridge. Beside the fridge will be a real pantry cabinet. My favorite part though is the small wall on the left. This will be shallow base cabinets that create just enough of a counter for a dedicated coffee station, with a microwave below, out of the way of the rest of the kitchen. We will add outlets to the island, which will store all the small appliances.  Generally, the cabinets will store the stuff based on how the counter above will be used - with really obvious changes like storing pots and pans by the stove to minimize travel time.  With two major prep areas, and other stuff out of the way, we should easily be able to get at least 2 cooks in the kitchen without stepping on each other.

the new layout - fridge and stove on top, sink in island

view from the mudroom

view from the dining room

The Design Plan
We've been eyeing a lot of kitchen pictures lately, and come up with a white marble on white cabinets plan because we need as much light as possible. Yes, it's pretty trendy and will someday look very 2010s, but aren't kitchens always that way? I've yet to find a kitchen design that is truly timeless - hopefully this one will stay around long enough for us to sell our house in a couple years. We are debating having dark blue bottom cabinets, maybe just on the island.

  1. Wood shelves (already there)
  2. Marble counters and subway backsplash
  3. Same offwhite color as the mudroom for the walls, maybe the dark blue one bottom cabinets
  4. Same pendent as the mudroom, bronze faucet
  5. White cabinets, shaker door, thinking Ikea
  6. Navy accents for towels and a rug
  7. Wood floors (replaced if needed)
The Work Plan
I've spent the last month tweaking the design and layout, so now I think we're really ready to get started. We're working on getting permits now, and then will start to reach out for quotes. The plan is to not use a general contractor, but to hire the trades individually instead to save costs. We will do some of the work ourselves, like installing the cabinets and tile, but hire out major stuff like plumbing and electrical, and maybe the demo and sheetrock too. 

Living in a construction site is never easy, but living without a kitchen is particularly hard. We're going to do what we can to move this along as quickly as possible, while relying on things like the grill and outdoor table, and probably lots of takeout. 

As I mentioned, the plan is to do the kitchen at the same time as the master suite because we will have to tear up floors and walls to install plumbing and electrical.  More on the master suite plan next.